AmneziaVPN – an open‑source VPN, specifically designed for reliable circumvention of DPI-censorship filters in countries with strict internet control (China, Russia, Belarus, Turkmenistan, Iran). It uses modern protocols that make the connection less noticeable to DPI systems. This is the simplest VPN for self‑hosting on your VPS. You can also use the free version or the premium version in the GUI App. AmneziaVPN undergoes annual security audits:
- AmneziaVPN Security Audit by 7ASecurity - 7ASecurity Blog
- New AmneziaVPN Security Audit by 7ASecurity - 7ASecurity Blog
Installation of AmneziaVPN app.
- Create a debian‑12-xfce or debian‑13-xfce template
- Open Start → Settings → Qubes Tools → Qubes Template Manager.
- Install the debian‑13‑xfce template
- After installation, update the template via Qubes Update
If servers for Qubes are blocked in your country, use Whonix with Snowflake bridges: Tor Control Panel → Configure → Bridges type → snowflake
- Install Required Packages in the Template
- Launch a terminal inside the debian‑13‑xfce template.
- Run:
sudo apt install libxcb-cursor0 libxcb-xinerama0 libnss-resolve iptables
- Download AmneziaVPN
- Open a browser in the default‑dvm (a disposable VM).
- Download the Linux version of AmneziaVPN:
Releases · amnezia-vpn/amnezia-client · GitHub
Mirror
- Copy the Downloaded File to the Debian Template
- Right‑click the downloaded file, choose Copy to other qube, then select the target VM debian‑13‑xfce.
- In the debian‑13‑xfce VM, open Thunar.
- Navigate to your home directory → QubesIncoming → the folder whose name starts with
disp…. Inside you’ll find the AmneziaVPN archive. - Extract the archive and run the installer.
- Refresh the Application Menu
- Open Qube Manager (click the blue cube icon on the panel).
- Select debian‑13‑xfce, then click App Shortcuts at the top.
- Click Refresh Applications to update the menu list.
- Shut down debian‑13‑xfce (right‑click → Shutdown).
- Create a new VPN AppVM
- In Qube Manager, create a new AppVM based on the debian-13-xfce template. Name it sys‑vpn or sys-amnezia.
- Go to App Shortcuts for sys‑vpn and move AmneziaVPN and Thunar to the right side.
- Install AmneziaVPN in the sys‑vpn VM
- Copy the AmneziaVPN installer file (the one you downloaded earlier) into sys‑vpn.
- Extract the archive again inside sys‑vpn and run the installer (Otherwise, AmneziaVPN might fail to start).
- Launch and configure AmneziaVPN
-
AppMenu → sys‑vpn → AmneziaVPN
-
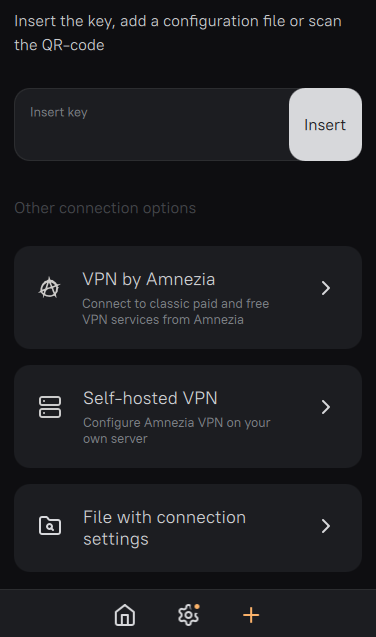
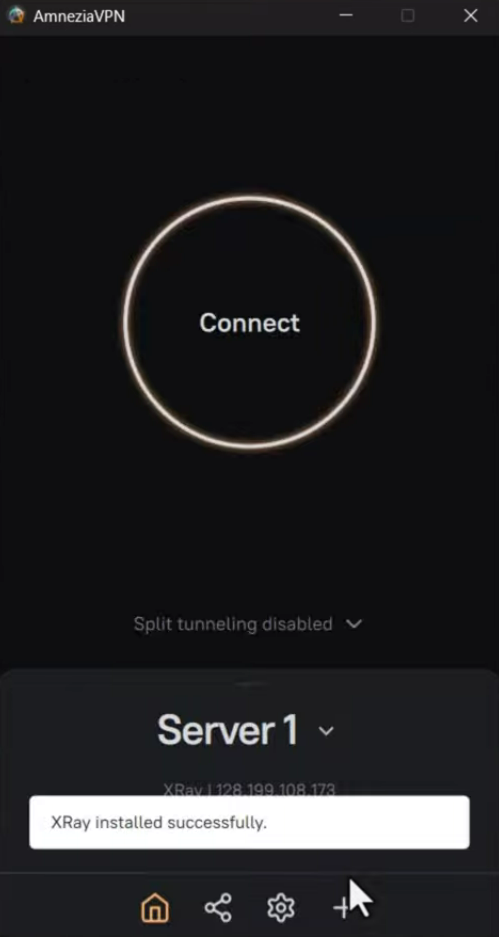
Click + and activate the VPN using a key, a configuration file, a connection to your own VPS, or use the free and premium VPN by Amnezia.
-
Enable VLESS protocol in settings.
-
Set up autostart if desired.
- Set Up a Kill Switch (Manual Configuration)
The built‑in kill switch in the AmneziaVPN app does not work under Qubes OS, so configure it manually in sys‑vpn
- Open a terminal in sys‑vpn and start Thunar with root privileges:
sudo thunar
- Edit the file
/rw/config/qubes-firewall-user-scriptand append the following rules at the bottom:
nft add rule ip qubes custom-forward tcp flags syn / syn,rst tcp option maxseg size set rt mtu
# Prevent the qube from forwarding traffic outside of the VPN
nft add rule qubes custom-forward oifname eth0 counter drop
nft add rule ip6 qubes custom-forward oifname eth0 counter drop
(The first command fixes slow connection issues on Linux by adjusting the MTU).
- Route Traffic Through the VPN
- Assign sys‑vpn as the Net qube for sys‑whonix and for any other AppVMs where you want to hide the IP address.
- Edit Global Update Settings
- Open Global Settings → Updates.
- Enable “Disable checking for updates for all existing qubes.”
- In the “Except for following qubes, for which checking for updates will be enabled” field, add sys‑vpn and sys‑whonix.
Remember that new AppVMs will be added to the exceptions list for update checks. You’ll need to manually delete any unnecessary AppVMs (with the real IP).

You can also use regular WireGuard config file and add it to the AmneziaVPN GUI application:
- Click + into AmneziaVPN app,
- Then select “File with connection settings”,
- Select wg.conf file and click “enable WireGuard obfuscation” option.

![]() Done!
Done!
Сelf‑host installation of AmneziaVPN.
- Buy a server (VPS), if you don’t have one
Minimum system requirements for VPS:
Operating System - Linux, suitable for Ubuntu 22.04 or Debian 11.
Supported processor architecture - x86-64.
Virtualization - KVM.
IPv4 address support
Random Access Memory (RAM) - recommended 2 GB, but not less than 1 GB.
Pre-installed software and control panel are not required.
To make it more convenient for you, we have selected several hosting providers. Choose a suitable server from the options provided below and follow the step-by-step instructions. You can also choose any other VPS provider at your discretion. All servers are provided as examples.
![]() Servers on Reg.ru and Yandex Cloud are not suitable for installing VPN with Amnezia
Servers on Reg.ru and Yandex Cloud are not suitable for installing VPN with Amnezia
![]() These hosting providers are provided as an example, we do not take responsibility for the quality of services provided by these companies and for potential risks.
These hosting providers are provided as an example, we do not take responsibility for the quality of services provided by these companies and for potential risks.
The best VPS for Amnezia: https://amnezia.host/en
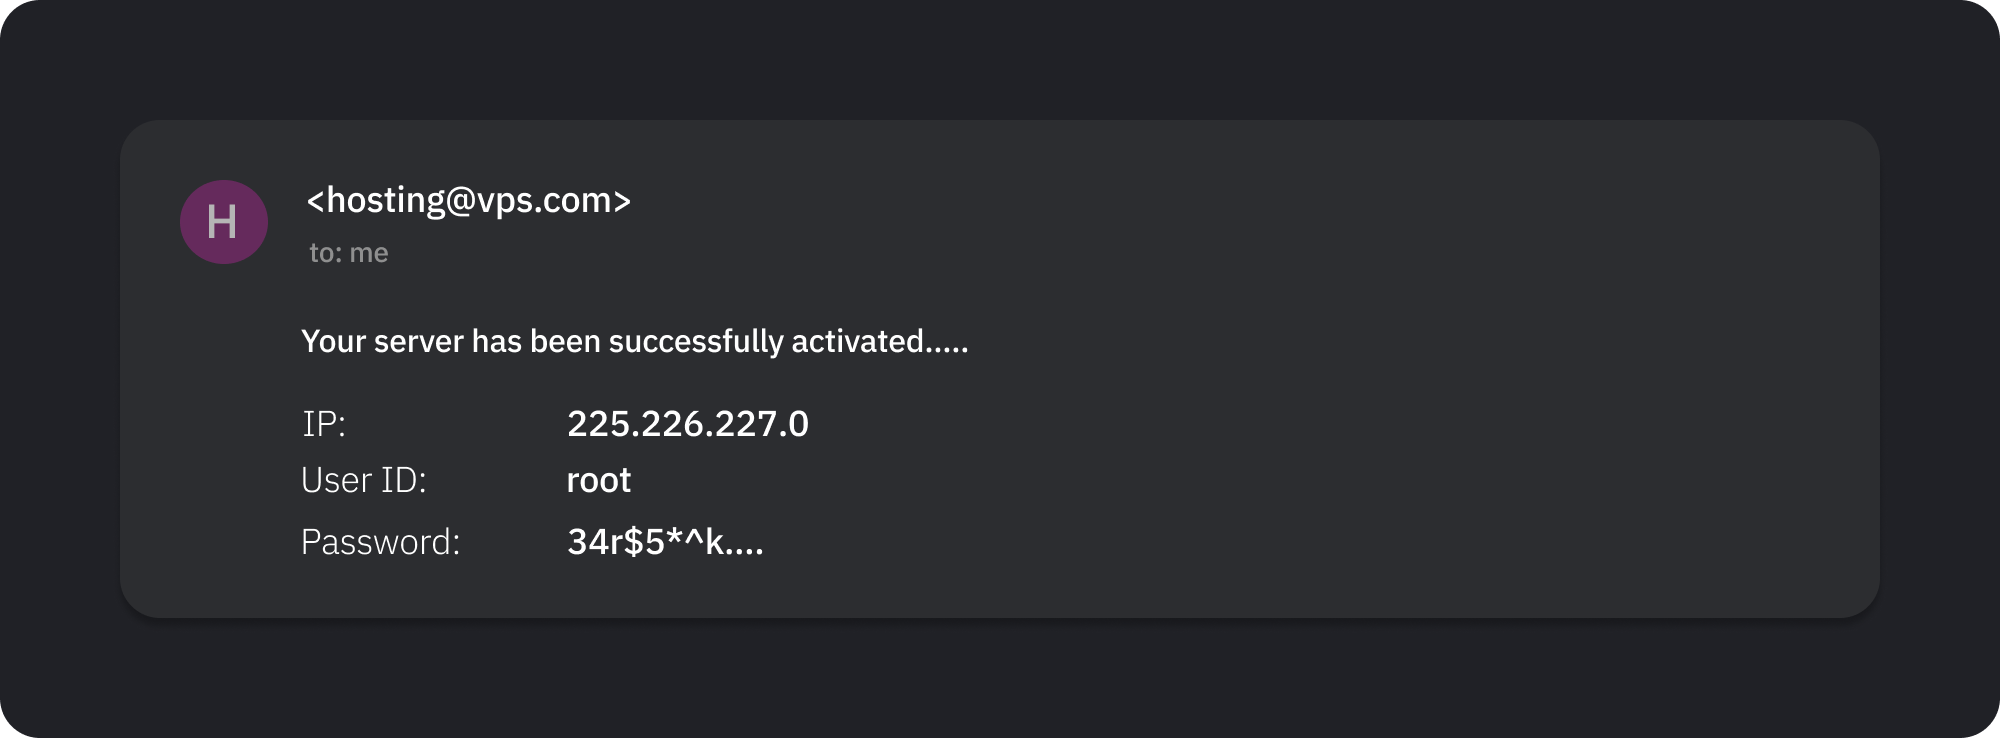
- You will receive an email from the hosting provider
The email should include the IP address, User name or User ID, and Password. You will need these for setting up the VPN on the server in the next step.
Some hosting providers do not send server details via email. In such cases, you can usually find the server information in your hosting provider’s account dashboard. If you encounter difficulties, contact their support.
- Download the AmneziaVPN app and enter the server details
After installation, launch the application.
On the first screen, select “I have connection details”, then “Set up your own server”, and enter the data from the email sent by the hosting provider.
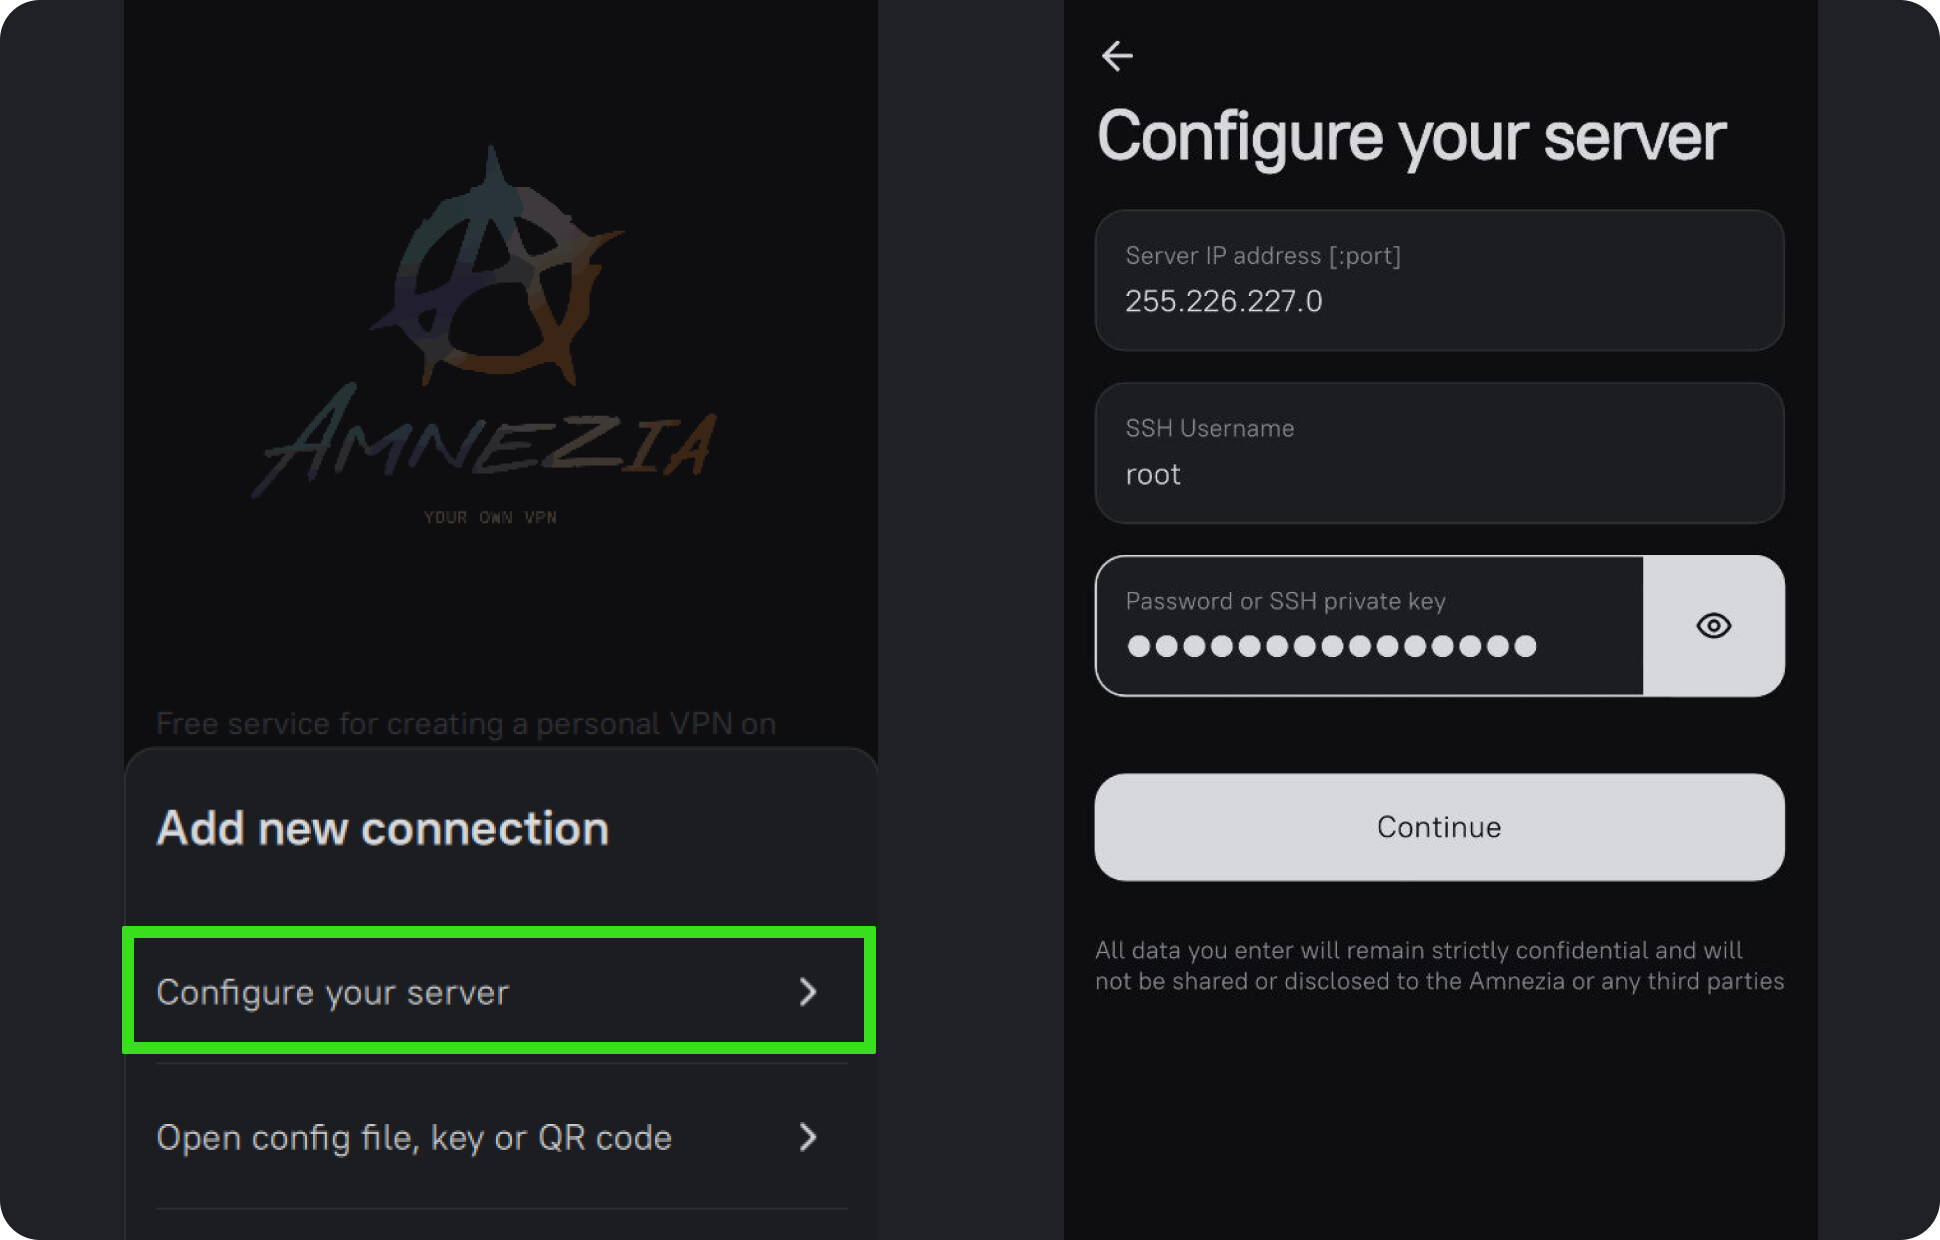
Press “Continue” for automatic installation and wait a moment.
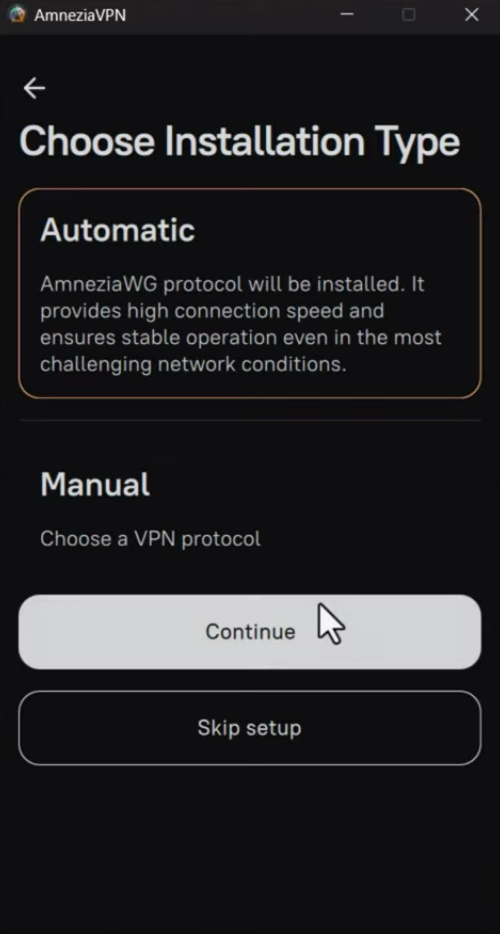
You can also choose the manual installation method - it’s just as easy! Click “Manual” and continue.
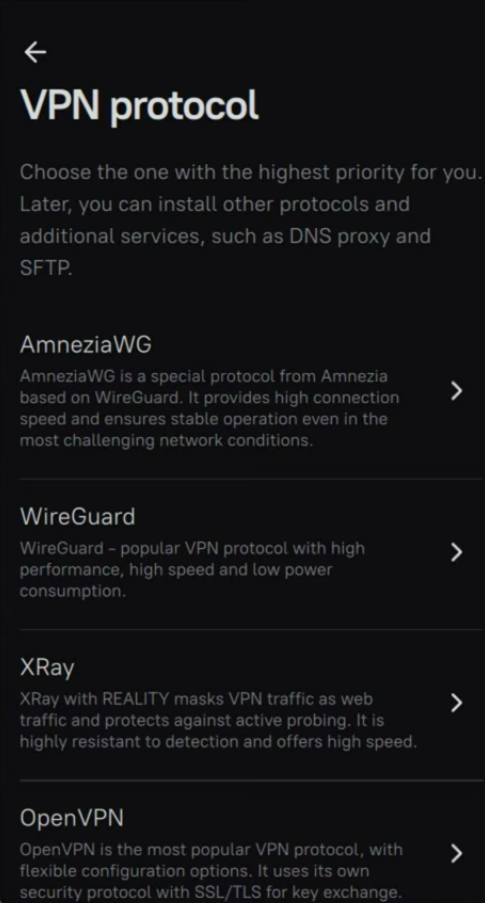
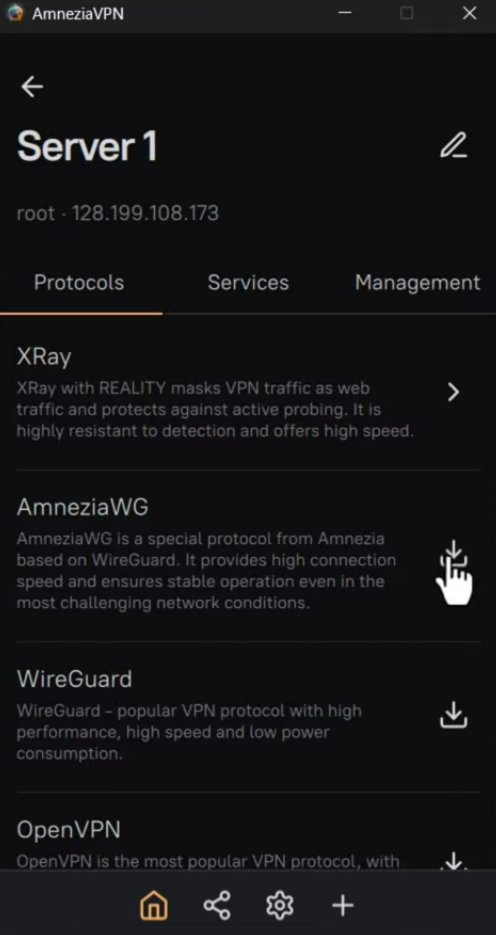
Select the protocol. The best options are AmneziaWG for very fast speeds or X‑Ray to counter aggressive internet blocking.
Then specify the port - you can keep the default port 443.
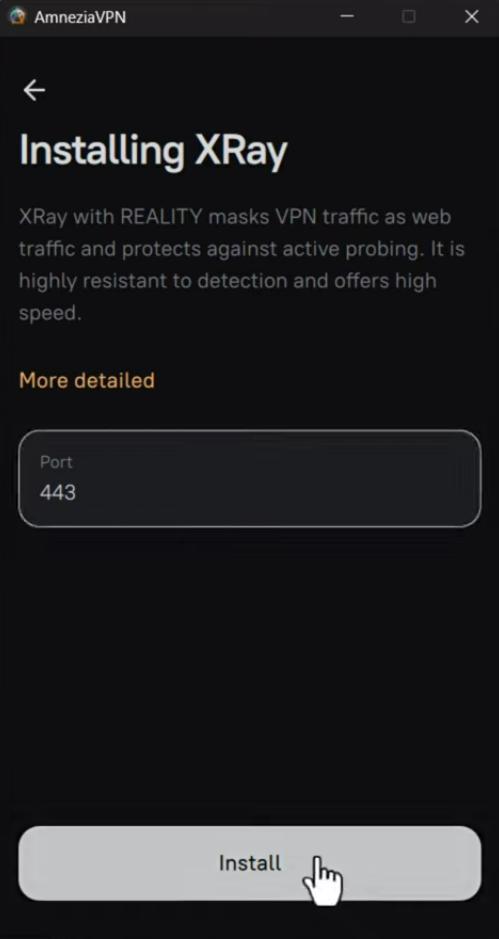
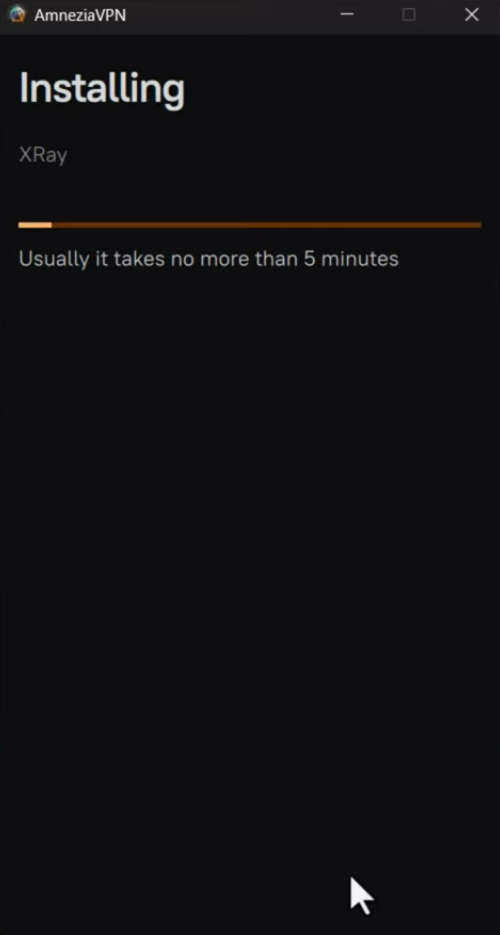
Finally, click Install and wait a few minutes.
That’s all!
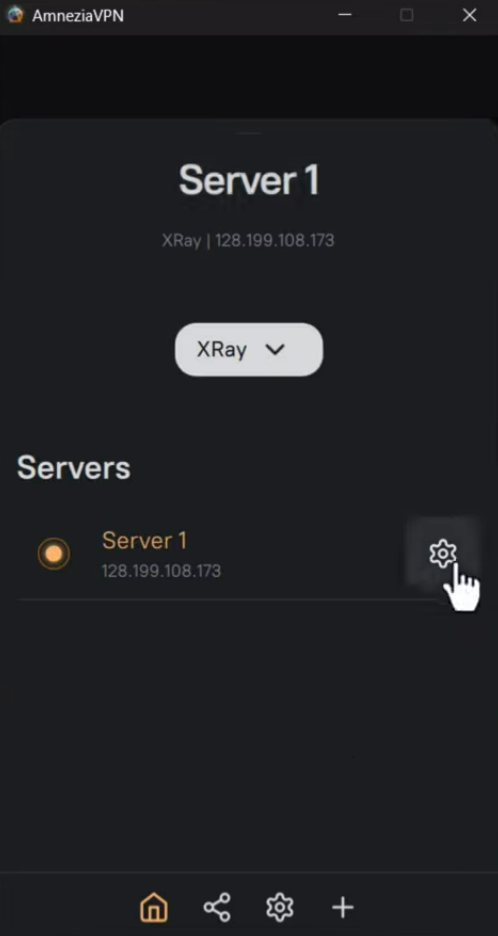
If you want to add other protocols, click your server, then the gear ![]() icon, and select additional protocol.
icon, and select additional protocol.
![]() Done!
Done!
Installation of AWG – WG fork with the best obfuscation.
- Install the kernel module in template
GitHub - amnezia-vpn/amneziawg-linux-kernel-module: AmneziaWG Linux kernel module · GitHub
Open terminal in template fedora-43-xfce or debian-13-xfce.
Use this guide for Manual build https://github.com/amnezia-vpn/amneziawg-linux-kernel-module:
http_proxy=http://127.0.0.1:8082 https_proxy=http://127.0.0.1:8082 git clone https://github.com/amnezia-vpn/amneziawg-linux-kernel-module.git
cd amneziawg-linux-kernel-module/src
Skip step 2 from github guide (you’re using the kernel from dom0).
make
sudo make install
- Activate the module and check it.
sudo modprobe amneziawg
lsmod | grep amneziawg
- Add module to autostart.
echo "amneziawg" | sudo tee /etc/modules-load.d/amneziawg.conf
- Install amnezia-tools.
GitHub - amnezia-vpn/amneziawg-tools: Tools for configuring Amnezia-WG · GitHub
http_proxy=http://127.0.0.1:8082 https_proxy=http://127.0.0.1:8082 git clone https://github.com/amnezia-vpn/amneziawg-tools.git
cd amneziawg-tools/src
make
sudo make install
- Now connect WireGuard configurations with
awgandawg-quicktools for hide the VPN connection!
Create a configuration file for your WG server or in your VPN app, or generate a awg-WARP config using generators:
1 Перенаправление на проект
2 https://warp-generator.vercel.app/
3 WARP WireGuard Config Generator
4 https://warp-gen.vercel.app/
5 GitHub - ImMALWARE/bash-warp-generator: Генератор конфига Cloudflare WARP для AmneziaVPN · GitHub
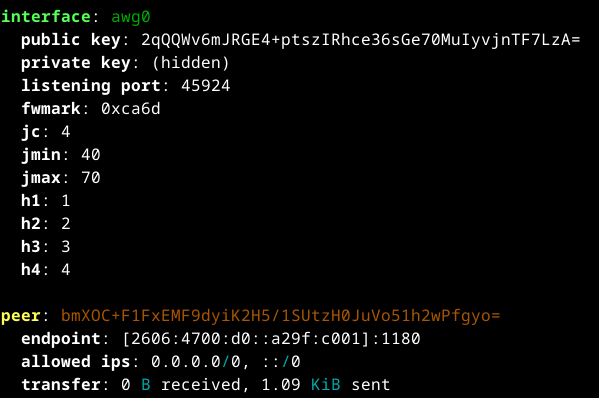
Remane it to awg0.conf. Edit file if you use your wireguard (add awg options), The configuration for AWG looks like this:
[Interface]
PrivateKey = ...
S1 = 0
S2 = 0
Jc = 4
Jmin = 40
Jmax = 70
H1 = 1
H2 = 2
H3 = 3
H4 = 4
MTU = 1280
Address = ...
DNS = ...

[Peer]
PublicKey = ...
AllowedIPs = ...
Endpoint = ...
Move awg0.conf into the template and paste it into /etc/amnezia/amneziawg/ and then shutdown the template.
- Create a sys-awg qube
Create a new AppVM based on the template with AWG, name it something like sys‑awg and enable the “Provides network” option. Then, in sys‑awg terminal enter:
sudo nano /rw/config/rc.local
and paste those commands:
sudo awg-quick up awg0
sudo systemctl enable --now awg-quick@awg0.service
Then set sys‑awg as the NetVM for the required appVMs. If the traffic isn’t being routed to appVMs, you need to add your awg’s DNS entry to /rw/config/rc.local in appVMs, for example:
sudo nano /rw/config/rc.local
and paste those commands:
echo 'nameserver 1.1.1.1' > /etc/resolv.conf
echo 'nameserver 1.0.0.1' > /etc/resolv.conf
Enter this command in sys-awg to test the connection to awg:
sudo awg show all
![]() Done!
Done!
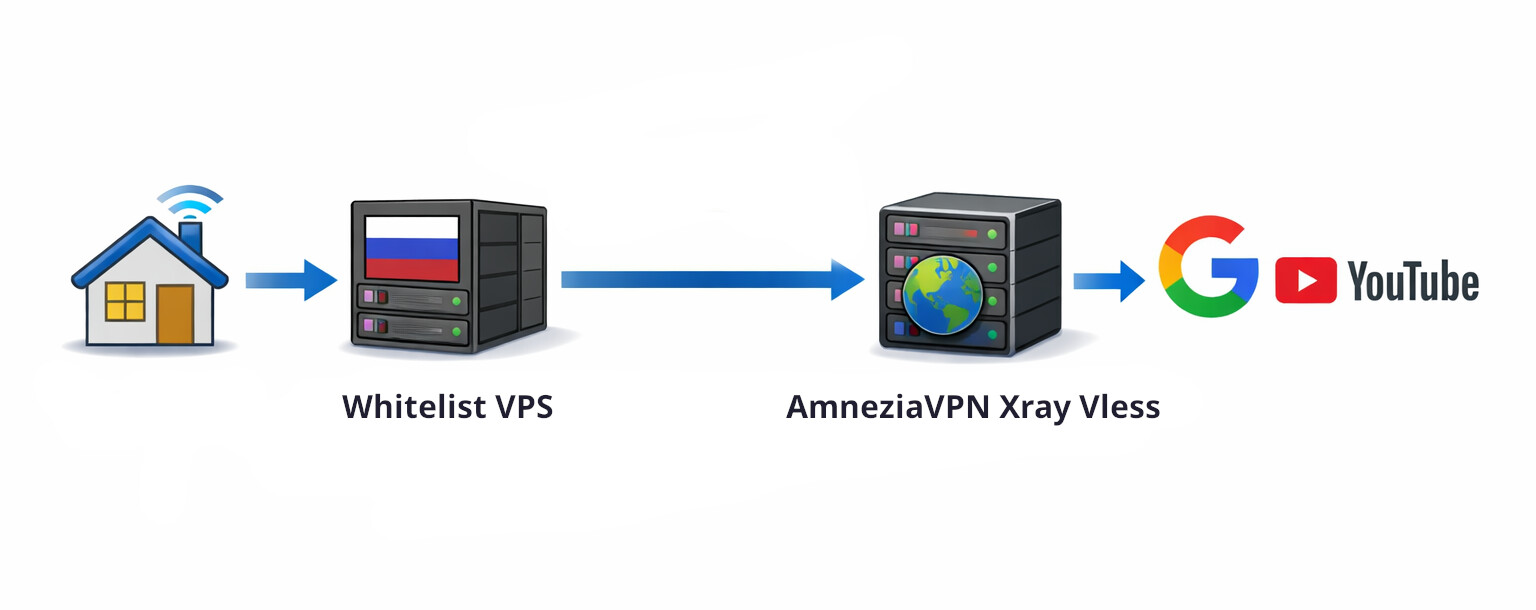
![]() If internet access in your country is blocked using whitelists (Russia, Iran), use a cascade VPN setup - a local VPS + VPS with AmneziaVPN. Here are some guides from the web:
If internet access in your country is blocked using whitelists (Russia, Iran), use a cascade VPN setup - a local VPS + VPS with AmneziaVPN. Here are some guides from the web:
- https://www.youtube.com/watch?v=LsjifCC-_Hs
- https://www.youtube.com/watch?v=QLWGKRI5a0E
- https://www.youtube.com/watch?v=Py6G03HVNC4
- https://www.instagram.com/reel/DR1EKnyCEG6/
![]() Also use amnesic RAM qubes to protect against forensics, and a USB Kill Switch - essential tools in totalitarian countries:
Also use amnesic RAM qubes to protect against forensics, and a USB Kill Switch - essential tools in totalitarian countries:
dom0 in RAM, Ephemeral encryption. Protection against forensics
Anonymize hostname hardened template automatic installation of browser
Antidetect‑appVM with FOSS Antidetect Browsers. Windows fingerprint. Random fingerprint in dvm
USB Kill Switch for Qubes OS
Wireguard VPN setup
How To make an OpenVPN Gateway in Qubes
VLESS obfuscation VPN