Split SSH implements a concept similar to having a smart card with your private SSH keys, except that the role of the “smart card” is played by another Qubes AppVM. This Qubes setup allows you to keep your SSH private keys in a vault VM (vault) while using an SSH Client VM (ssh-client) to access your remote server. This is done by using Qubes’s qrexec framework to connect a local SSH Agent socket from your SSH Client VM to the SSH Agent socket within the vault VM. This way the compromise of the domain you use to connect to your remote server does not allow the attacker to automatically also steal all your keys. (We should make a rather obvious comment here that the so-often-used passphrases on private keys are pretty meaningless because the attacker can easily set up a simple backdoor which would wait until the user enters the passphrase and steal the key then.)

Security Benefits
In the setup described in this guide, even an attacker who manages to gain access to the ssh-client VM will not be able to obtain the user’s private key since it is simply not there. Rather, the private key remains in the vault VM, which is extremely unlikely to be compromised if nothing is ever copied or transferred into it. In order to gain access to the vault VM, the attacker would require the use of, e.g., a general Xen VM escape exploit or a signed, compromised package which is already installed in the TemplateVM upon which the vault VM is based.
Overview
- Make sure the TemplateVM you plan to use is up to date.
- Create
vaultandssh-clientAppVMs. - Create an ssh key in your
vaultAppVM and set up automatic key adding prompt. - Set up VM interconnection
- (Strongly Encouraged) Create a KeePassXC Database and set up SSH Agent Integration in KeePassXC.
Preparing your system
Make sure the templates you plan to base your AppVMs on are up-to-date.
Creating AppVMs
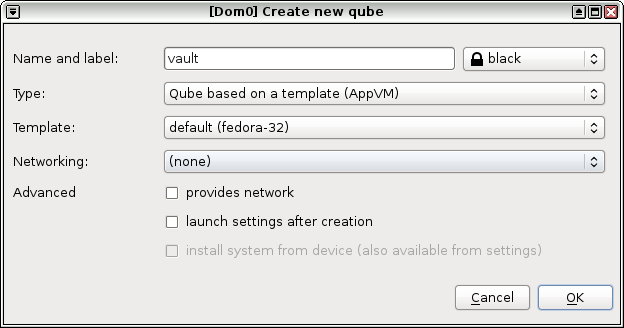
If you’ve installed Qubes OS using the default options, a few qubes including a vault AppVM has been created for you. Skip the first step if you don’t wish to create another vault.
-
Create a new vault AppVM (
vault) based on your chosen template. Set networking to(none). -
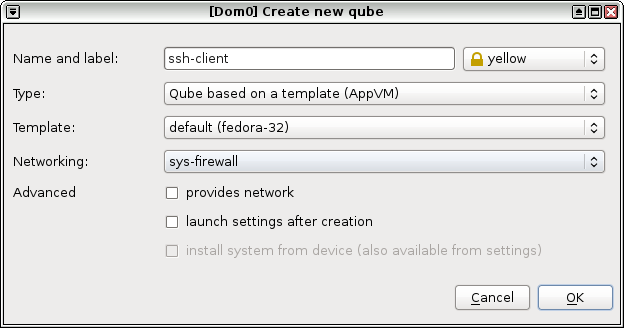
Create a SSH Client AppVM (
ssh-client). This VM will be used to make SSH connections to your remote machine.
Setting up SSH
Install ssh-askpass in the template of your vault VM. It will be used by ssh-agent to ask for confirmation, for keys added using ssh-add -c.
For Fedora templates:
sudo dnf install openssh-askpass
For Debian templates:
sudo apt-get install ssh-askpass-gnome
Perform the next steps in the AppVM vault.
-
Generate an SSH key pair. Skip this step if you already have your keys. Note that it is okay to not enter a password for your private keys since the
vaultAppVM has no networking. If you still want to encrypt your keys you must refer to the Securing Your Private Key section.[user@vault ~]$ ssh-keygen -t ed25519 -a 500 Generating public/private ed25519 key pair. Enter file in which to save the key (/home/user/.ssh/id_ed25519): Created directory '/home/user/.ssh'. Enter passphrase (empty for no passphrase): Enter same passphrase again: Your identification has been saved in /home/user/.ssh/id_ed25519 Your public key has been saved in /home/user/.ssh/id_ed25519.pub The key fingerprint is: SHA256:DBxSxZcp16d1NSVSid3m8HRipUDM2INghQ4Sx3jPEDo user@vault The key's randomart image is: +--[ED25519 256]--+ | o==+++.@++o=*| | o==o+ B BoOoB| | Eoo* + *.O.| | . o+ . o| | S | | | | | | | | | +----[SHA256]-----+-t: type
-a: num_trialsPlease note that the key fingerprint and the randomart image will differ.
For more information about
ssh-keygen, runman ssh-keygen.
Notice: Skip the following steps if you plan on using KeePassXC.
-
Make a new directory
~/.config/autostartmkdir -p ~/.config/autostart -
Create the file
~/.config/autostart/ssh-add.desktop-
Open the file with e.g.
geditgedit ~/.config/autostart/ssh-add.desktop -
Paste the following contents:
[Desktop Entry]
Name=ssh-add
Exec=ssh-add -c
Type=Application
Note: If you’ve specified a custom name for your key using -f, you should adjust
Exec=ssh-addtoExec=ssh-add <path-to-your-key-file>. -
Setting Up VM Interconnection
In dom0:
To control which VM is allowed as a client, which may act as the server and how we want this interaction to happen, we have to write a policy file for qrexec in dom0.
-
Create and edit
/etc/qubes/policy.d/50-ssh.policy.-
Open the file with e.g.
nano.sudo nano /etc/qubes/policy.d/50-ssh.policy -
If you want to explicitly allow only this connection, add the following line:
qubes.SshAgent * ssh-client vault ask default_target=vault -
If you want all of your VMs to potentially be an
ssh-clientor avault, add the following line:qubes.SshAgent * @anyvm @anyvm ask -
If you want the input field to be “prefilled” by your
vaultVM, appenddefault_target=vaultso it looks like for example:qubes.SshAgent * @anyvm @anyvm ask default_target=vault
-
Old policy file for Qubes R4.1
-
Create and edit
/etc/qubes-rpc/policy/qubes.SshAgent.-
Open the file with e.g.
nano.sudo nano /etc/qubes-rpc/policy/qubes.SshAgent -
If you want to explicitly allow only this connection, add the following line:
ssh-client vault ask -
If you want all of your VMs to potentially be an
ssh-clientor avault, add the following line:@anyvm @anyvm ask -
If you want the input field to be “prefilled” by your
vaultVM, appenddefault_target=vaultso it looks like for example:@anyvm @anyvm ask,default_target=vault
-
Note: There are many ways to fine-tune this policy. For more details see the Qubes qrexec documentation.
In the Template of Your AppVM vault:
We now need to write a small script that handles connection requests from ssh-client and forwards them to the SSH agent in your vault. As we are using qrexec as communication method we have to place it in a special location and have to name it just as the policy file we just created in dom0.
-
Create and edit
/etc/qubes-rpc/qubes.SshAgent.-
Open the file with e.g.
geditsudo gedit /etc/qubes-rpc/qubes.SshAgent -
Paste the following contents:
#!/bin/sh
# Qubes App Split SSH Script

# safeguard - Qubes notification bubble for each ssh request
notify-send "[$(qubesdb-read /name)] SSH agent access from: $QREXEC_REMOTE_DOMAIN"

# SSH connection
socat - "UNIX-CONNECT:$SSH_AUTH_SOCK"
-
-
Make it executable
sudo chmod +x /etc/qubes-rpc/qubes.SshAgent
In the AppVM ssh-client
Theoretically, you can use SSH in any AppVM. However, if you are considering split-SSH as an additional security layer it is probably reasonable to also think about which VMs you will be using SSH in. For instance, you might want a dedicated admin domain for these purposes. Depending on how many systems you plan to access and where they are located, it could also be preferable to have different VMs with different firewall rules for Intranet and Internet administration.
We want to make sure that our ssh-client is prepared to use split-ssh right after the VM has started. Therefore, we add a script in rc.local (Which will run at VM startup) to listen for responses from vault and make SSH use this connection by modifying the user’s .bashrc.
-
Edit
/rw/config/rc.local.-
Open the file with e.g.
gedit.sudo gedit /rw/config/rc.local -
Add the following to the bottom of the file:
# SPLIT SSH CONFIGURATION >>>
# replace "vault" with your AppVM name which stores the ssh private key(s)
SSH_VAULT_VM="vault"

if [ "$SSH_VAULT_VM" != "" ]; then
  export SSH_SOCK="/home/user/.SSH_AGENT_$SSH_VAULT_VM"
  rm -f "$SSH_SOCK"
  sudo -u user /bin/sh -c "umask 177 && exec socat 'UNIX-LISTEN:$SSH_SOCK,fork' 'EXEC:qrexec-client-vm $SSH_VAULT_VM qubes.SshAgent'" &
fi
# <<< SPLIT SSH CONFIGURATION
-
-
Edit
~/.bashrcand add the following to the bottom of the file:-
Open the file with e.g.
geditgedit ~/.bashrc -
Add the following to the bottom of the file:
# SPLIT SSH CONFIGURATION >>>
# replace "vault" with your AppVM name which stores the ssh private key(s)
SSH_VAULT_VM="vault"

if [ "$SSH_VAULT_VM" != "" ]; then
  export SSH_AUTH_SOCK="/home/user/.SSH_AGENT_$SSH_VAULT_VM"
fi
# <<< SPLIT SSH CONFIGURATION
-
Securing Your Private Key
Although passwords wouldn’t protect you against a full system compromise (attacker could place a keylogger), it’s possible for an adversary to gain read-only access to some of your files (e.g., file shares or offline backups of data). This becomes even more likely if you plan to also use your data outside of Qubes and not be able to modify anything. Passwords are advisable for mitigating these threats .
You can either use the built-in password utility of your private key combined with a graphical prompt or prefer to use KeePassXC. Please note that since ssh-askpass prompt is displayed on vault VM boot, it is not possible to use both configurations simultaneously.
Using the Built-in Password Utility and ssh-askpass
You should have added ssh-askpass to your vault template earlier when setting up SSH.
-
Either add a password to an existing private key with
ssh-keygen -por directly create a key pair with a password (enter password when prompted during the creation process, see above). Note that the location and name of your private key may differ.[user@vault ~]$ ssh-keygen -p Enter file in which the key is (/home/user/.ssh/id_rsa): /home/user/.ssh/id_ed25519 Key has comment 'user@vault' Enter new passphrase (empty for no passphrase): Enter same passphrase again: Your identification has been saved with the new passphrase. -
Shutdown the template and restart your
vaultVM.
With this configuration you’ll be prompted for entering your password every time you start your vault VM to be able to make use of your SSH key.
Using KeePassXC
Note: This part is for setting up KeePassXC, not KeePassX or KeePass. See the KeePassXC FAQ.
KeePassXC should be installed by default in both Fedora and Debian TemplateVMs. If it’s not or you’re using another template, you can install it manually.
A note on managing your Qubes domains: You might already be using KeePassXC to store your passwords. This guide explains how to set up a new KeePass database and use it exclusively for SSH keys. However, it is also possible to mix your passwords and SSH keys in one big database. Others might have dedicated databases for different kinds of passwords, potentially even in different vault VMs. There is no right or wrong here. Feel free to skip the first five steps if you want to use an existing database.
-
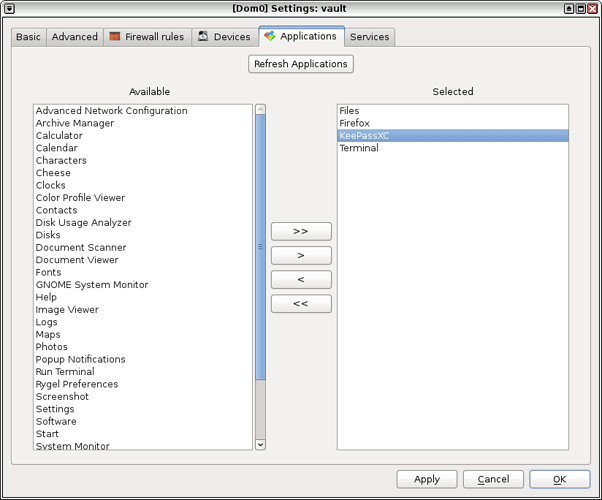
Add KeepasXC to the Applications menu of the newly created AppVM for ease of access and launch it.
Note: Since the vault VM has no internet connection, you can safely deny automatic updates if prompted.
-
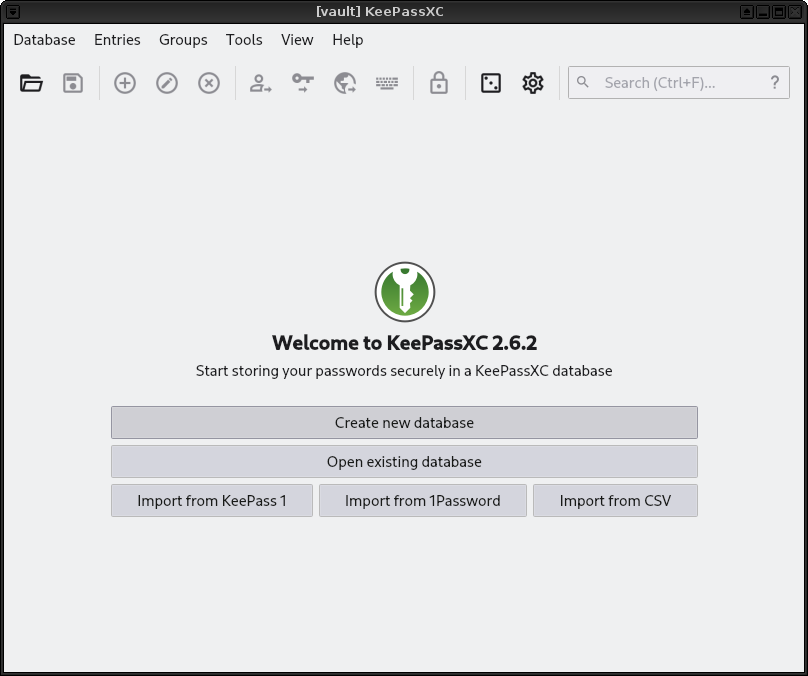
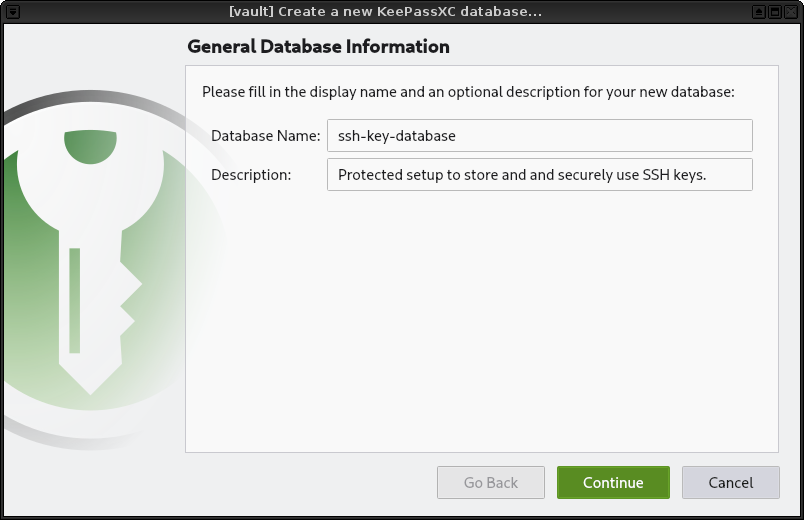
Create a new database.
-
Enter a name for your database and continue.
-
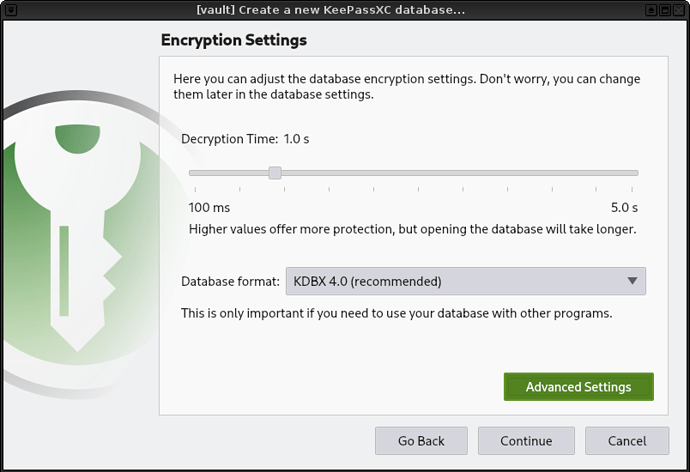
Adjust the encryption settings. Check the KeePassXC User Guide for more information about these settings.
-
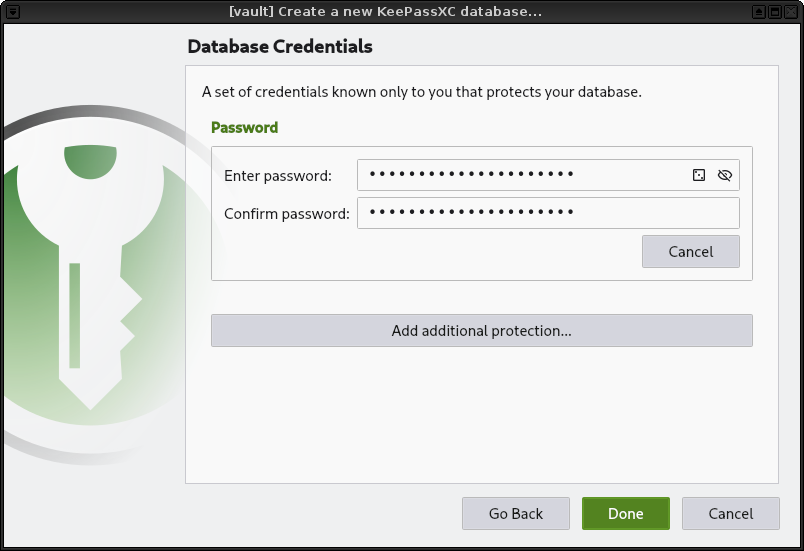
Enter a password for your database. Take your time make a secure but also rememberable password. (hint)
-
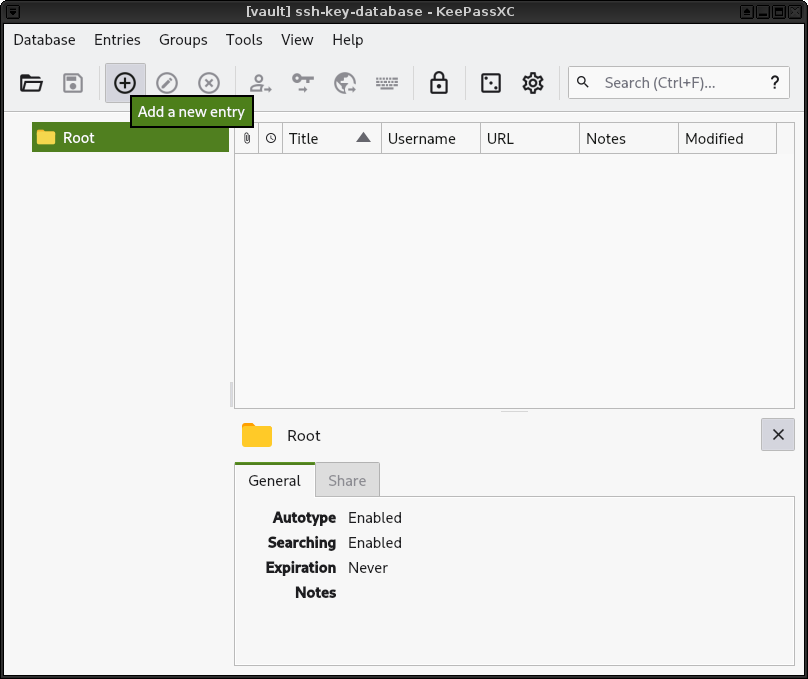
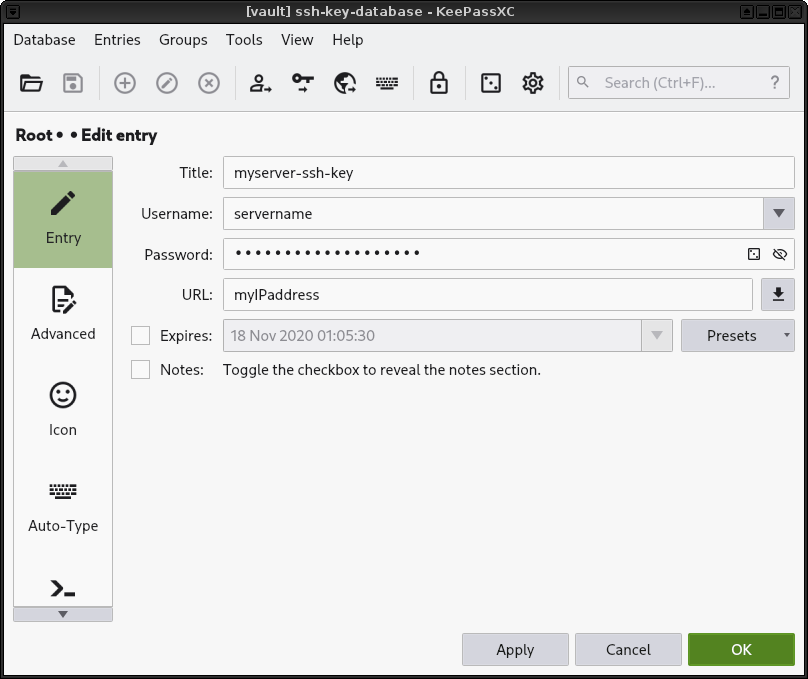
Add a new entry.
-
Set password to your SSH key passphrase.
-
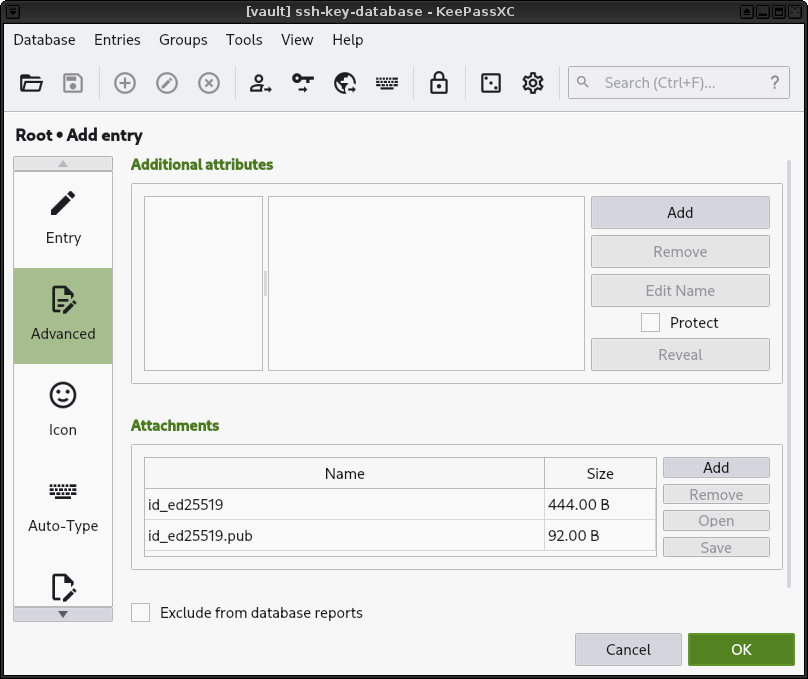
Go into the Advanced section and add your keys.
Note: Technically, you only need to add the private key (
id_25519) for the following steps to work. If you add the public key here, too, you can later on backup your kdbx file and have everything in one place. You can even delete your keys (id_25519andid_25519.pub) from your file system if you like. -
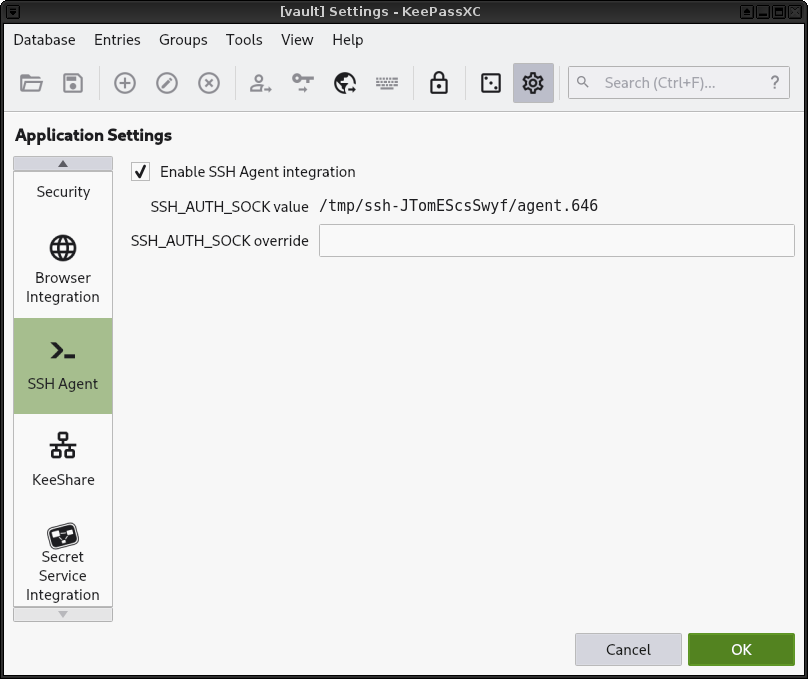
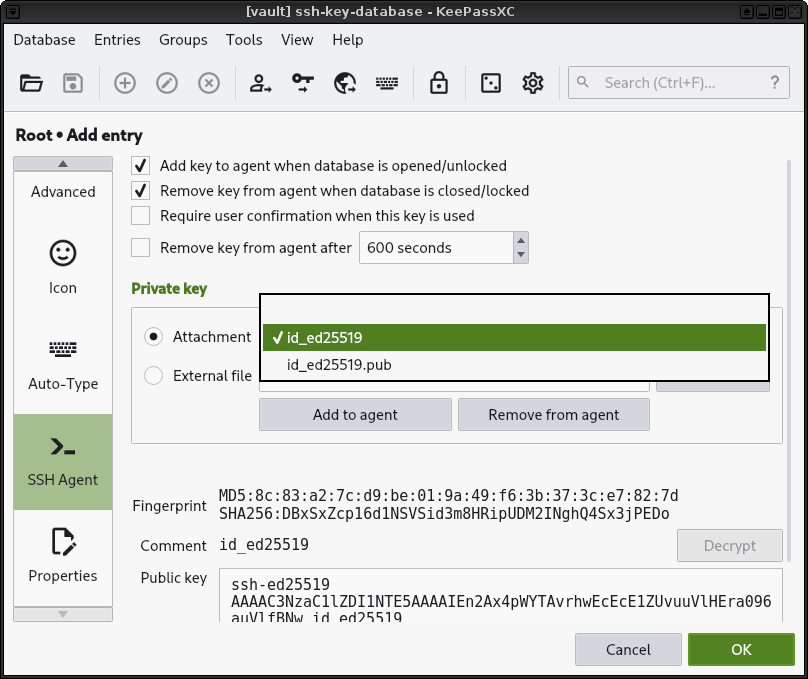
Enable “SSH Agent Integration” within the Application Settings.
-
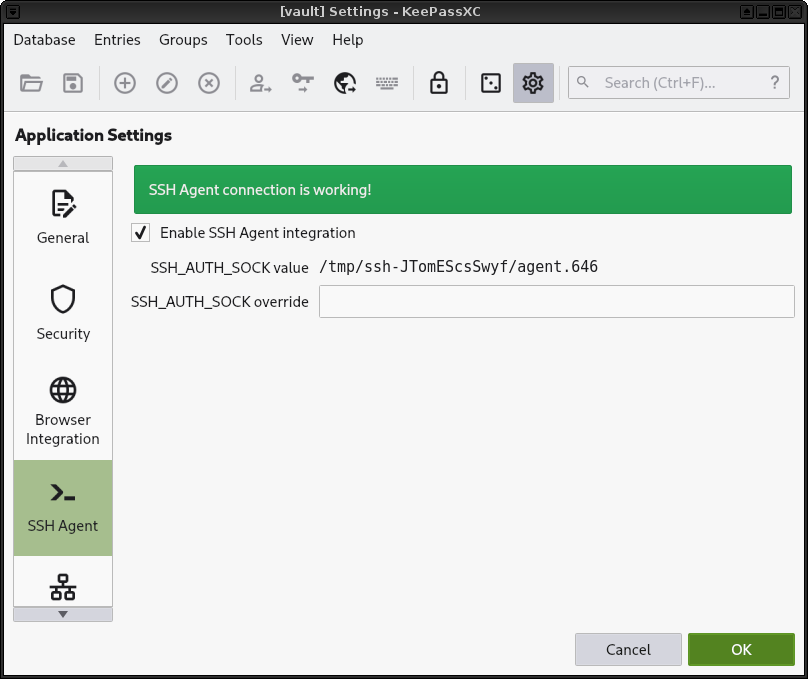
Restart KeePassXC
-
Check the SSH Agent Integration status.
-
Open the entry you created and select your private key in the “SSH Agent” section. Don’t forget to also check the first two options.
Testing the KeePassXC Setup
-
Close your KeePassXC database and run
ssh-add -Lin avaultVM terminal. It should returnThe agent has no identities.[user@vault ~]$ ssh-add -L The agent has no identities. -
Unlock your KeePassXC database and run
ssh-add -Lagain. This time it should return your public key.[user@vault ~]$ ssh-add -L ssh-ed25519 <public key string> user@vault-keepassxc
Test Your Configuration
-
If you’re using KeePassXC, shutdown KeePassXC on your vault VM. If not, make sure your private key is not added to the ssh-agent in your vault VM (Check with
ssh-add -L). If it is, restart your vault VM and do not enter your password when it asks you to. -
Try fetching your identities on the SSH Client VM.
ssh-add -L -
Allow operation execution. (If you don’t see the below prompt, check your VM interconnection setup.)
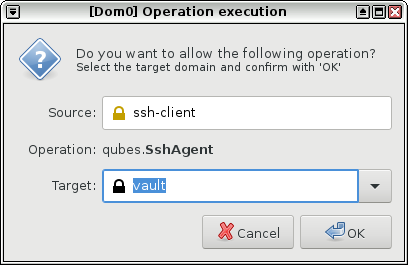
It should return The agent has no identities..
If you’re getting an error (e.g. error fetching identities: communication with agent failed), make sure your vault VM is running and check your VM interconnection setup.
-
Launch KeePassXC and unlock your database.
-
Repeat steps 1 and 2.
Check if it returns ssh-ed25519 <public key string>
If you’re getting an error (e.g. error fetching identities: communication with agent failed), make sure your vault VM is running and check your VM interconnection setup.
Current limitations
- It is possible for a malicious VM to hold onto an ssh-agent connection for more than one use. Therefore, if you authorize usage once, assume that a malicious VM could then use it many more times. In this case, though, the SSH Agent will continue to protect your private keys; only usage of it would be available to the malicious VM until it is shut down.
- The two actions below should allow the user to know what is requested before the operation gets approved, but has not been fully verified:
- configuring the vault to use
ssh-add -cas described above - configuring KeepassXC to “Require user confirmation when this key is used”
- configuring the vault to use
Want more Qubes split magic? Check out Split-GPG.
This guide has been inspired by:
Qubes Split SSH (Github: Jason Hennessey - henn) https://github.com/henn/qubes-app-split-ssh
Using split ssh in QubesOS 4.0 (Kushal Das) https://kushaldas.in/posts/using-split-ssh-in-qubesos-4-0.html
Using Split-SSH in Qubes 4 (Denis Zanin) https://deniszanin.com/using-split-ssh-gpg-in-qubes-os/
R.I.S.K.S. https://19hundreds.github.io/risks-workflow/ssh-split-setup
This document was migrated from the qubes-community project
- Page archive
- First commit: 18 Nov 2020. Last commit: 03 Jun 2023.
- Applicable Qubes OS releases based on commit dates and supported releases: 4.0, 4.1
- Original author(s) (GitHub usernames): tungsten987, shaaati, ephemer4l, ypid, awokd, ydirson, CrsiX, null
- Original author(s) (forum usernames): N/A
- Document license: GPLv2