Some people, including some core developers, are interacting with this forum via email. They do not receive the edits. For them, it would be useful to include the contents of the updated post into the spoiler:
Updated first post
Used device in testing and confirm is worked :
windows vmware (host using old pc) and my laptop.
both are using uefi.
Keep in mind that below are disk i used in the tutorial, you can use 2 flashdrive (1 boot, 1 header) + 1 hdd or whatever you want.
/dev/nvme0n1 = system
/dev/sda = flashdrive
Please watch out any space, slash, periode in command issue / files IT REALLY MATTER
- After booting into installation in language section, press ctrl + alt + f2
—# WARNING CONFIRM YOUR DISK FIRST BEFORE EXECUTING COMMAND
[anaconda /] dd if=/dev/urandom of=/dev/nvme0n1 bs=1M status=progress
[anaconda /] dd if=/dev/urandom of=/dev/sda bs=1M status=progress
Using /dev/urandom will take longer than /dev/zero but more secure.
- Create 3 partition in usb drive, just follow below command as i need the rest of space (i need around 20mb) for luks header.
[anaconda /] gdisk /dev/sda
—# efi partition
n
1
2048
1230845
EF00
—# boot partition
n
2
1230848
3278842
8300
—# header partition
n
3
(enter)
(enter)
(enter)
w
Y
—# I use iter time 1 for speeding up decrypt process you should increase it in real installation, see 5.13 for details.
[anaconda /] cryptsetup -c aes-xts-plain64 -h sha512 -s 512 -y -i 1 --use-random luksFormat /dev/nvme0n1
[luks prompt /] YES
[luks prompt /] (enter password)
[luks prompt /] (verify password)
[anaconda /] cryptsetup luksOpen /dev/nvme0n1 luks
[luks prompt /] (enter password)
[anaconda /] pvcreate /dev/mapper/luks
[anaconda /] vgcreate qubes_dom0 /dev/mapper/luks
[anaconda /] lvcreate -n swap -L 4G qubes_dom0
[anaconda /] lvcreate -T -L 20G qubes_dom0/root-pool
[anaconda /] lvcreate -T -l +100%FREE qubes_dom0/vm-pool
[anaconda /] lvs
—#
root-pool 20.00g
swap 4.00g
vm-pool 19.90g
—#
[anaconda /] lvcreate -V20G -T qubes_dom0/root-pool -n root
[anaconda /] lvcreate -V19.9G -T qubes_dom0/vm-pool -n vm
[anaconda /] mkfs.xfs /dev/qubes_dom0/vm
—# I use xfs because it much faster than ext4 when boot up, btw i dont do benchmark it’s just My Life Experience based on using qubes.
Otherwise :
[anaconda /] mkfs.ext4 /dev/qubes_dom0/vm
- Back to gui with ctrl + alt + f6.
- Choose language, timezone, user, and lastly storage.
- Click refresh on bottom right and rescan disk.
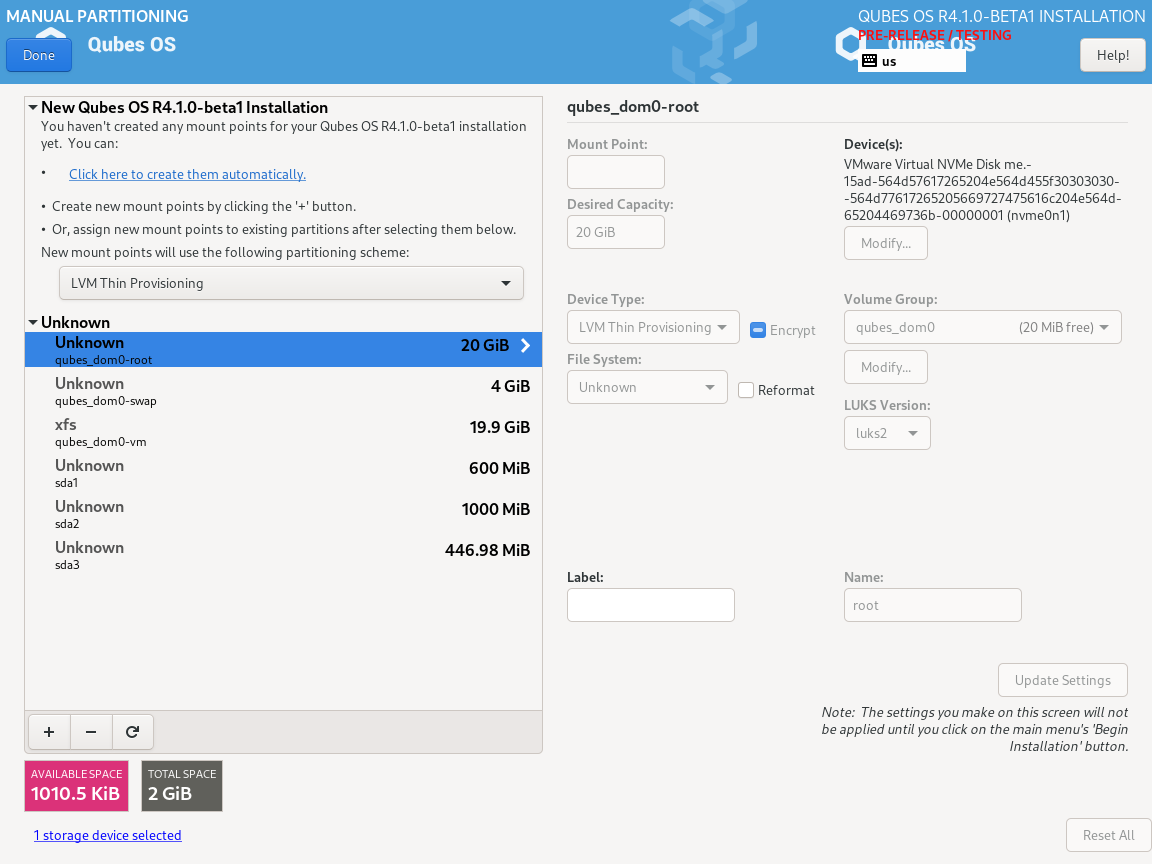
- Select disk nvme0n1 and sda, storage configuration is Custom.
—# reformat disk
qubes_dom0-root, reformat, ext4, /, update settings.
qubes-dom0-swap, reformat, swap, update settings.
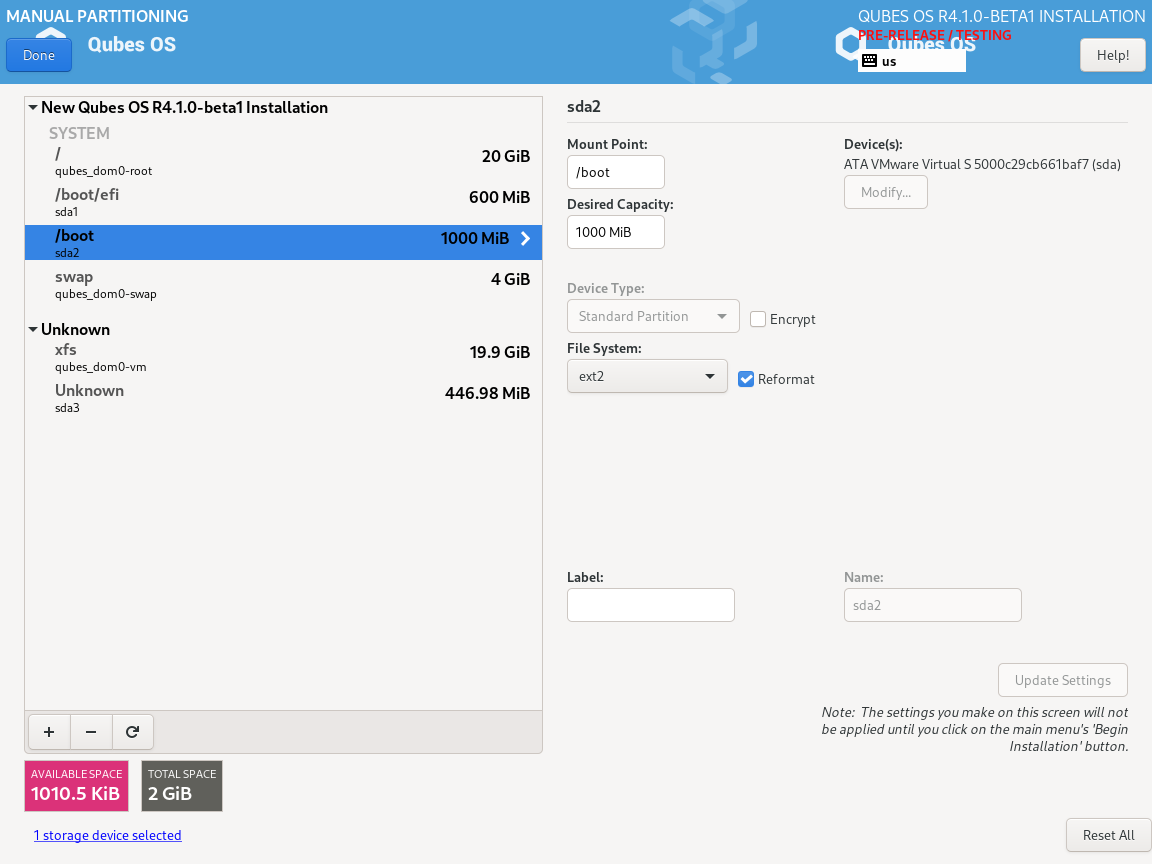
sda1, reformat, Efi System Partition, /boot/efi, update settings.
sda2, reformat, ext2, /boot, update settings.
—# leave qubes_dom0-vm and sda3 untouched.
- Click done and begin installation.
- After completion, switch back to shell with ctrl + alt + f2
[anaconda /] cp -r /usr/lib/grub/x86_64-efi /mnt/sysroot/boot/efi/EFI/qubes/
[anaconda /] chroot /mnt/sysroot/
[anaconda /] mount -oremount,ro /boot
[anaconda /] install -m0600 /dev/null /tmp/boot.tar
[anaconda /] tar -C /boot --acls --xattrs --one-file-system -cf /tmp/boot.tar .
[anaconda /] umount /boot/efi
[anaconda /] umount /boot
[anaconda /] exit
—# WARNING CONFIRM YOUR DISK FIRST BEFORE EXECUTING COMMAND
[anaconda /] dd if=/dev/urandom of=/dev/sda2 bs=1M status=progress
[anaconda /] cryptsetup -c twofish-xts-plain64 -h sha512 -s 512 -y -i 1 --use-random --type luks1 luksFormat /dev/sda2
[luks prompt /] YES
[luks prompt /] (enter password)
[luks prompt /] (verify password)
—#
[anaconda /] uuidR=“$(blkid -o value -s UUID /dev/nvme0n1)”
[anaconda /] uuidB=“$(blkid -o value -s UUID /dev/sda2)”
[anaconda /] cryptsetup luksOpen /dev/sda2 luks-$uuidB
[anaconda /] mkfs.ext2 -m0 -U $uuidB /dev/mapper/luks-$uuidB
—#
[anaconda /] vi /mnt/sysroot/etc/fstab
—# Change UUID=…on boot line to /dev/mapper/luks-(your $uuidB) and leave the rest to default value
[anaconda /] chroot /mnt/sysroot
[anaconda /] mount -v /boot
[anaconda /] tar -C /boot --acls --xattrs -xf /tmp/boot.tar
[anaconda /] mount /dev/sda1 /boot/efi
[anaconda /] echo “GRUB_ENABLE_CRYPTODISK=y” >> /etc/default/grub
—# create luks keys so we dont have to enter any password after grub
[anaconda /] mkdir /etc/keys
[anaconda /] dd if=/dev/urandom bs=1 count=64 of=/etc/keys/root.key conv=excl,fsync
[anaconda /] dd if=/dev/urandom bs=1 count=64 of=/etc/keys/boot.key conv=excl,fsync
[anaconda /] cryptsetup luksAddKey /dev/nvme0n1 /etc/keys/root.key
[luks prompt /] (system password)
[anaconda /] cryptsetup luksAddKey /dev/sda2 /etc/keys/boot.key
[luks prompt /] (boot password)
[anaconda /] cryptsetup luksHeaderBackup /dev/nvme0n1 --header-backup-file header
—# WARNING CONFIRM YOUR DISK FIRST BEFORE EXECUTING COMMAND
[anaconda /] dd if=/header of=/dev/sda3 bs=16M count=1 status=progress
[anaconda /] exit
[anaconda /] echo “luks-$uuidB UUID=$uuidB /etc/keys/boot.key luks,key-slot=1” | tee -a /mnt/sysroot/etc/crypttab
[anaconda /] mount --bind /dev /mnt/sysroot/dev
[anaconda /] mount --bind /dev/pts /mnt/sysroot/dev/pts
[anaconda /] mount --bind /sys /mnt/sysroot/sys
[anaconda /] mount --bind /proc /mnt/sysroot/proc
[anaconda /] chroot /mnt/sysroot
[anaconda /] vi /etc/crypttab
—# Change root device value so it look like this
[anaconda /] vi /etc/dracut.conf.d/misc.conf
add_dracutmodules+=" crypt "
install_items+=" /etc/keys/root.key /etc/keys/boot.key /sbin/cryptsetup "
[anaconda /] vi /usr/lib/dracut/modules.d/90crypt/module-setup.sh
—# write a persistence device at /etc/block_uuid.map in generated initramfs
echo “/dev/nvme0n1 $uuidR
/dev/disk/by-uuid/$uuidB $uuidB” > “{initdir}/etc/block_uuid.map”
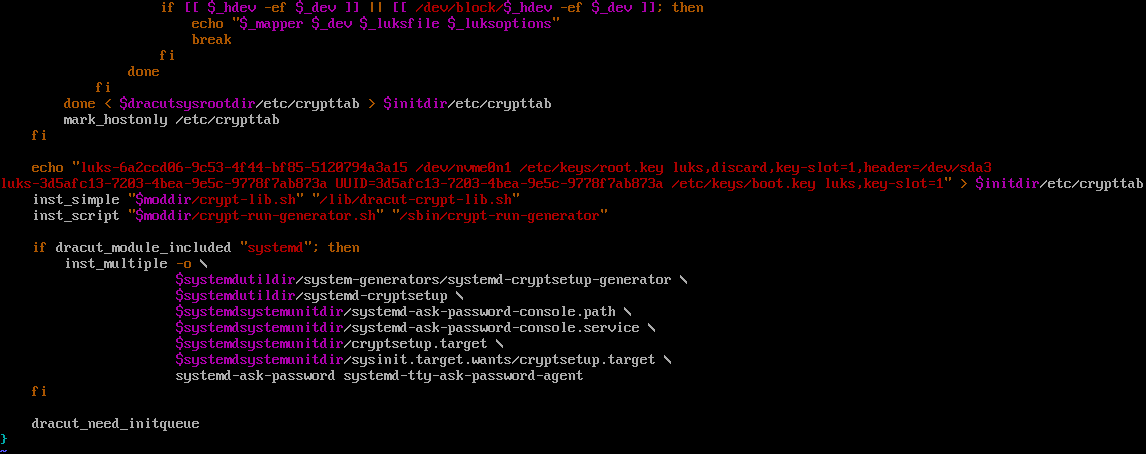
—# write a persistence device at /etc/crypttab in generated initramfs (we can’t inject /etc/crypttab files in dracut.conf)
echo “luks-$uuidR /dev/nvme0n1 /etc/keys/root.key luks,discard,key-slot=1,header=/dev/sda3
luks-$uuidB UUID=$uuidB /etc/keys/boot.key luks,key-slot=1” > $initdir/etc/crypttab
[anaconda /] grub2-mkconfig -o /boot/efi/EFI/qubes/grub.cfg
[anaconda /] dracut -v -f /boot/initramfs-*
[anaconda /] exit
[anaconda /] umount /mnt/sysroot/boot/efi
[anaconda /] umount /mnt/sysroot/boot
[anaconda /] umount -l /mnt/sysroot
[anaconda /] umount -l /mnt/sysimage
[anaconda /] swapoff /dev/qubes_dom0/swap
[anaconda /] vgchange -a n qubes_dom0
[anaconda /] cryptsetup luksClose /dev/mapper/luks
[anaconda /] cryptsetup luksClose /dev/mapper/luks-$uuidB
[anaconda /] cryptsetup luksErase /dev/nvme0n1
[luks prompt /] YES
[anaconda /] wipefs -a /dev/nvme0n1
[anaconda /] reboot
—# Screenshoot