Prestium OS is a Tails OS-like live linux distro. Unlike Tails, Prestium routes its internet connections through I2P network. This makes Prestium a nice choice for visiting I2P websites, forums, torrent trackers and more. In this guide, I will show you the steps to get a Prestium OS Standalone VM qube going.
-
Download Prestium OS ISO file from https://prestium.org. For QubesOS use, we will need the
EEedition of the ISO, namely,Prestium-1.6.0-EE-amd64.isoat the current time of writing. Download this file to one of your qubes. Take a note of the qube you have downloaded this ISO file, we will use that qube to boot the Prestium ISO. -
Create a new qube. Open Qube Manager. Click on “Create a new qube” icon on the upper right hand side. Name it “Prestium”, pick color purple, pick “Type: StandaloneVM (fully persistent)”, pick “Template: (none)”, leave its networking as the default, and tick “Launch settings after creation”. Then Click OK.
-
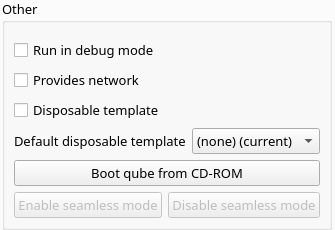
Prestium qube settings. Here are some screenshots for various settings:
-
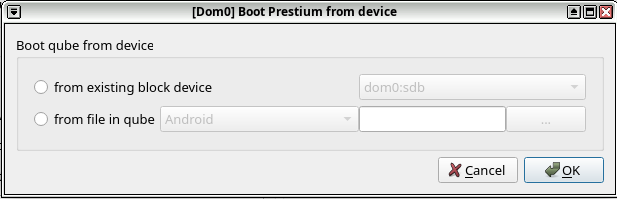
Boot the Prestium OS ISO. On the Advanced Settings tab for Prestium qube, select “Boot from CD-ROM”. Select “from file in qube” and the qube’s name from step 1, click on triple dots and navigate to the file directory of the Prestium OS ISO file. Then click OK.
-
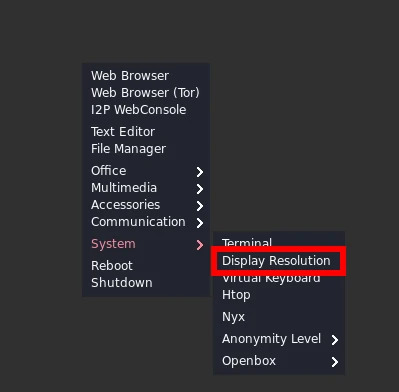
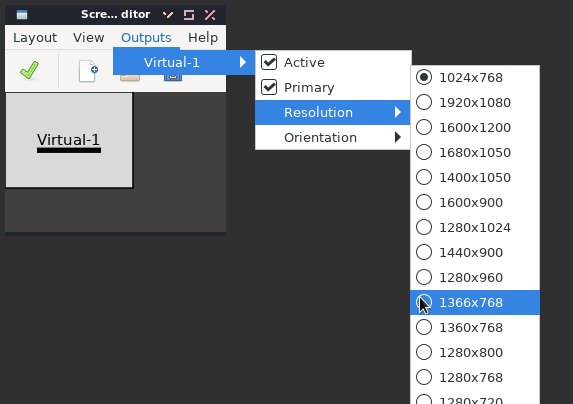
QubesOS will create a new virtual machine and boot up the ISO file. After a minute or so, you will be presented with the PrestiumOS desktop. First, adjust your PrestiumOS screen resolution to your liking. Right click on the desktop:
-
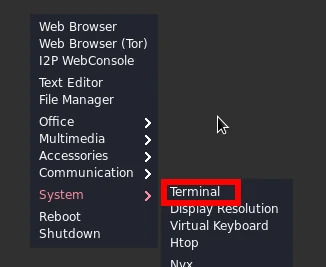
Setup networking for Prestium. Right click on the desktop and pull up a terminal, and repeat the commands on the screenshots. Adjust your IP ADDRESS (in red) and GATEWAY (in green) values according to the values given in your Prestium VM. These values are shown in step 3, or you can check them again by Click Qube Tray Icon > Prestium > Settings


Change to the root account:
$ su -
type-in toor for the password:

$ ip a

$ ip address add <IP-ADDRESS-HERE>/8 dev enX0
$ ip route add default via <GATEWAY-ADDRESS-HERE> dev enX0

- Restart i2pd service.

Press q to quit out of the systemctl output. Lastly, type exit to close the terminal.
With step 7, the setup concludes, you should be able to right click on the desktop, select “Web Browser” and start browsing the I2P sites.
Keep in mind that Prestium is a Live-distro, meaning, all your changes, new file creations, etc. will be deleted once your shut down Prestium OS. It is, in this sense, amnesic.
Helpful? Tips xmr:
85BsYQLX9RZGWrhXjErQg9VNpwCq7tpi4eSjR2MAbywBNKVxEd1aUEyHpZ5pFjfNaHie5xdLF5XbdjSTDuPDRESZ42V7CMC