此指南实现了将 i2pd 作为 netvm ,以此可以用来便捷的代理流量经过 i2p 网络访问 clearnet ,或者访问 i2p 网络中的服务,这可以大大的增加安全性与隐私性。
这是相较于 I2pd netvm guide 的另一种更好的实现方法,使用 debian-12 进行操作,同时并不使用版本落后的 i2pd-qt 与 archlinux 社区模板。。
安装
- 首先,您需要拥有 debian-12-xfce template vm。
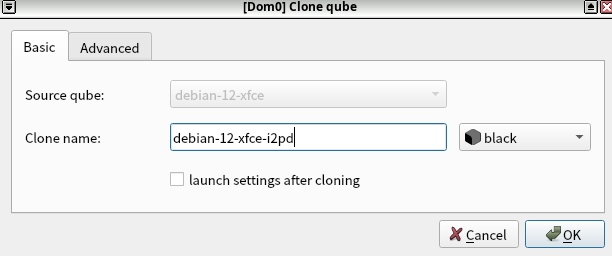
- 克隆一个名为 debian-12-xfce-i2pd 的 template vm。
在 debian-12-xfce-i2pd 虚拟机中执行以下命令:
sudo apt install wget
wget -q -O - https://repo.i2pd.xyz/.help/add_repo | sudo bash -s -
sudo apt update
sudo apt install i2pd
这里使用的是 i2pd 团队的仓库,会自动推送的是最新的 i2pd 。
- 继续安装 clash-verge-rev:
请进入 Releases · clash-verge-rev/clash-verge-rev · GitHub 查看对应版本的 clash-verge-rev ,这里使用最新的稳定版 v2.0.2 ,同时给 debian-12-xfce-i2pd 设置合适的 netvm 以连通互联网(把 .deb 安装包在其他vm上下载好后转移到 debian-12-xfce-i2pd 当然可以)
wget https://github.com/clash-verge-rev/clash-verge-rev/releases/download/v2.0.2/Clash.Verge_2.0.2_amd64.deb
sudo apt install ./Clash.Verge_2.0.2_amd64.deb
shutdown now
创建新的虚拟机
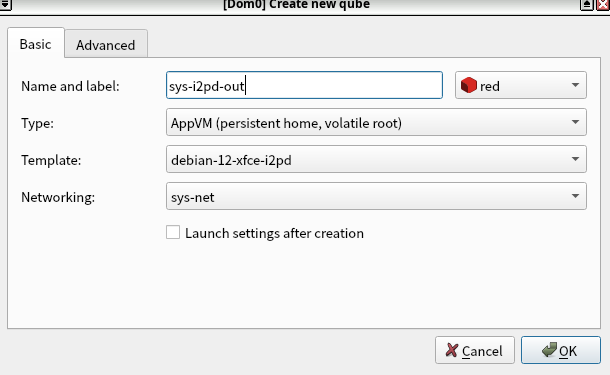
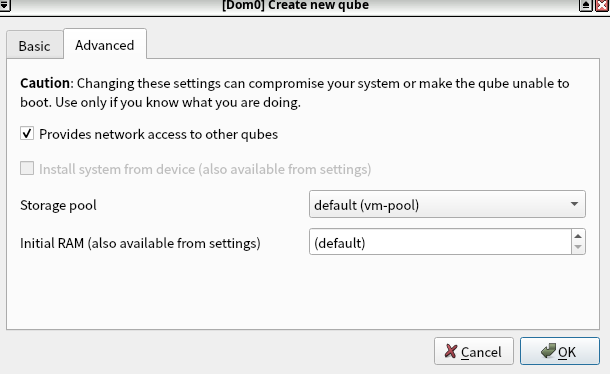
创建 sys-i2pd-out

在 sys-i2pd-out 中执行以下命令:
sudo systemctl enable i2pd.service
sudo nft add rule ip qubes custom-input meta l4proto tcp ct state new,established tcp dport 4500 accept
等待 10-20 分钟,直到 i2pd 开始接受连接。
在另一个终端标签中运行以下命令以进行简单监控:
watch curl --socks5-hostname 127.0.0.1:4447 acetone.i2p
当上述命令有响应时,继续下一步。
修改启动命令
- 将以下内容粘贴到文件
/rw/config/rc.local中:
#!/bin/bash
sudo nft add rule ip qubes custom-input meta l4proto tcp ct state new,established tcp dport 4500 accept
- 运行以下指令
sudo mkdir -p /rw/config/qubes-bind-dirs.d
sudo touch /rw/config/qubes-bind-dirs.d/50_user.conf
添加以下内容到 /rw/config/qubes-bind-dirs.d/50_user.conf
binds+=( '/etc/i2pd' )
-
重启 sys-i2pd-out 虚拟机。
-
将以下内容粘贴到文件
/etc/i2pd/tunnels.conf中:
[socks-outproxy-tcp]
type = client
address = 0.0.0.0
port = 4500
keys = transient-outproxy
destination = outproxy.acetone.i2p
destinationport = 1080
inbound.length = 1
outbound.length = 1
inbound.lengthVariance = 1
outbound.lengthVariance = 1

[socks-outproxy-udp]
type = udpclient
address = 127.0.0.1
port = 4500
keys = transient-outproxy
destination = outproxy.acetone.i2p
destinationport = 1080
如果需要使用其他 outproxy ,可以更换其中的一些参数
- 在
/etc/i2pd/i2pd.conf文件的[socksproxy]部分中添加以下内容:
outproxy.enabled = true
outproxy = 127.0.0.1
outproxyport = 4500
- 重启 sys-i2pd-out 虚拟机。
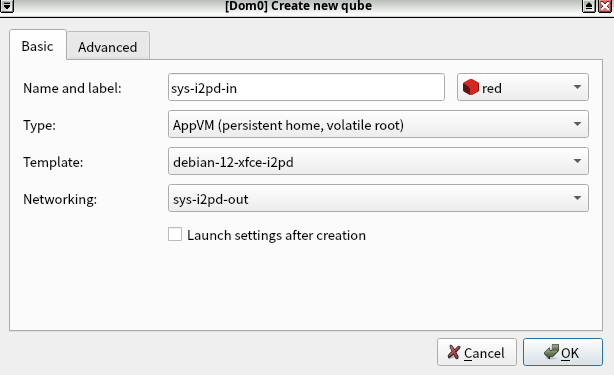
创建 sys-i2pd-in
打开终端,输入 clash-verge 启动


- 在 Clash Verge 应用程序中创建新配置文件:
- 点击
Profiles > New - 类型选择
Local,然后保存。
- 点击
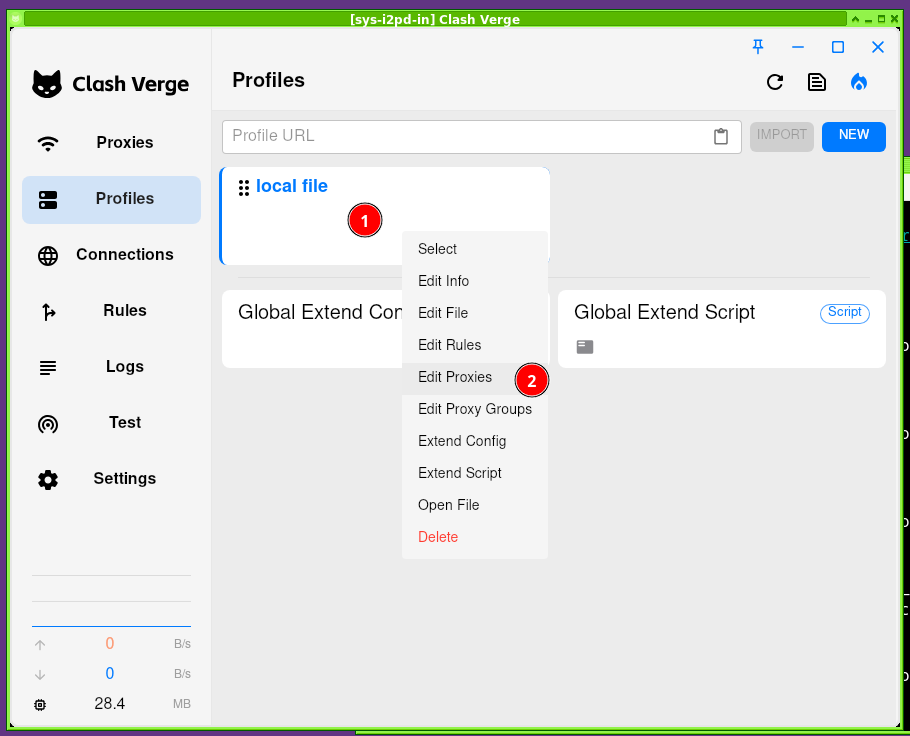
- 编辑代理设置:
- 点击
MRB > Edit Proxies。
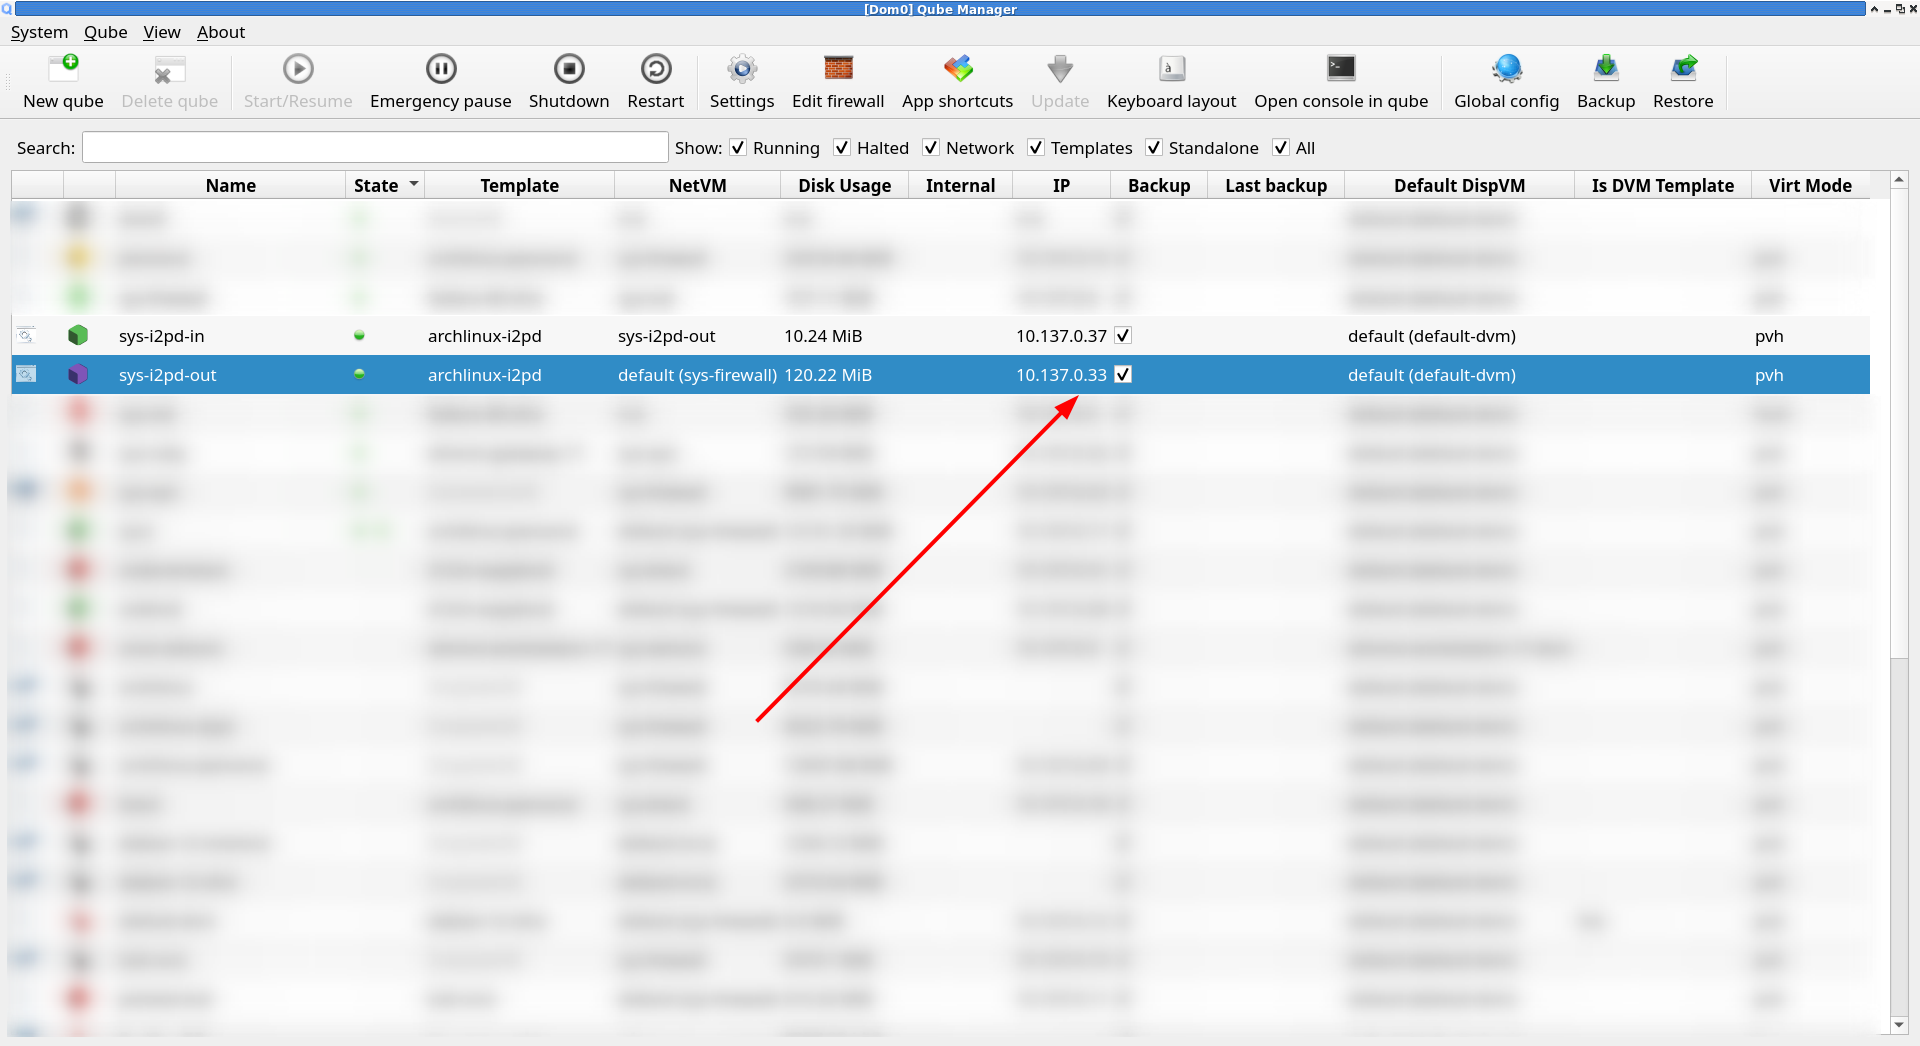
- 检查 sys-i2pd-out 在 Qube Manager 中的 IP 地址。
- 输入
socks5://<YOUR_IP>:4500,然后保存。
- 点击
- 在
Proxies > Global中启用代理。
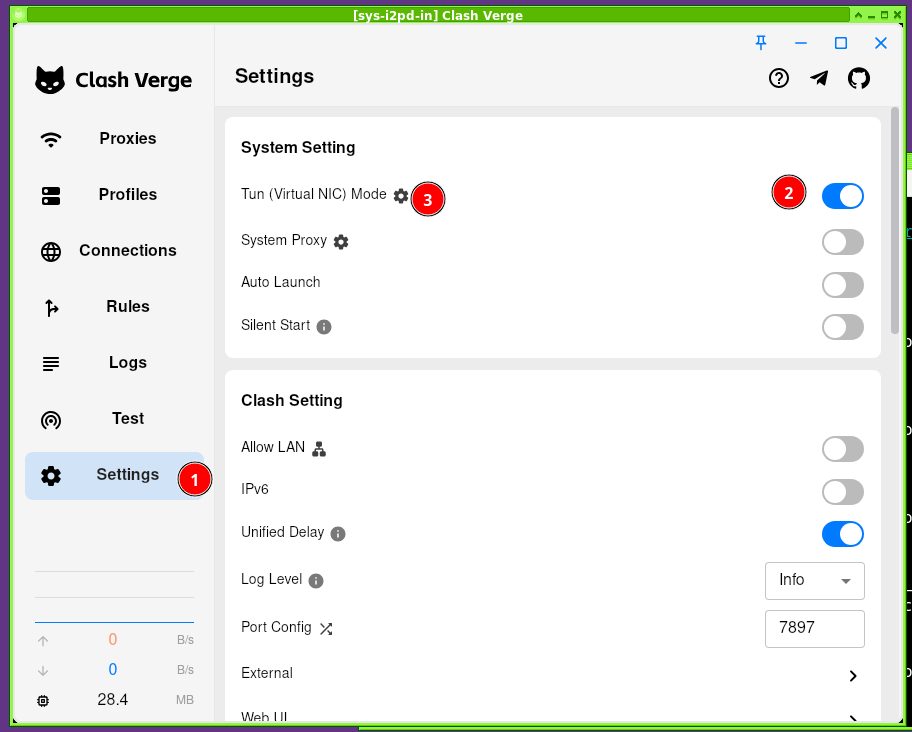
- 在
Setting > System Setting > Auto Launch中启用自动启动


添加防火墙规则(Kill Switch)
在 dom0 中执行以下命令:
qvm-firewall sys-i2pd-in reset
qvm-firewall sys-i2pd-in add accept <sys-i2pd-out-ip-here> dstports=4500 proto=tcp
qvm-firewall sys-i2pd-in del --rule-no 0
额外的内容
验证
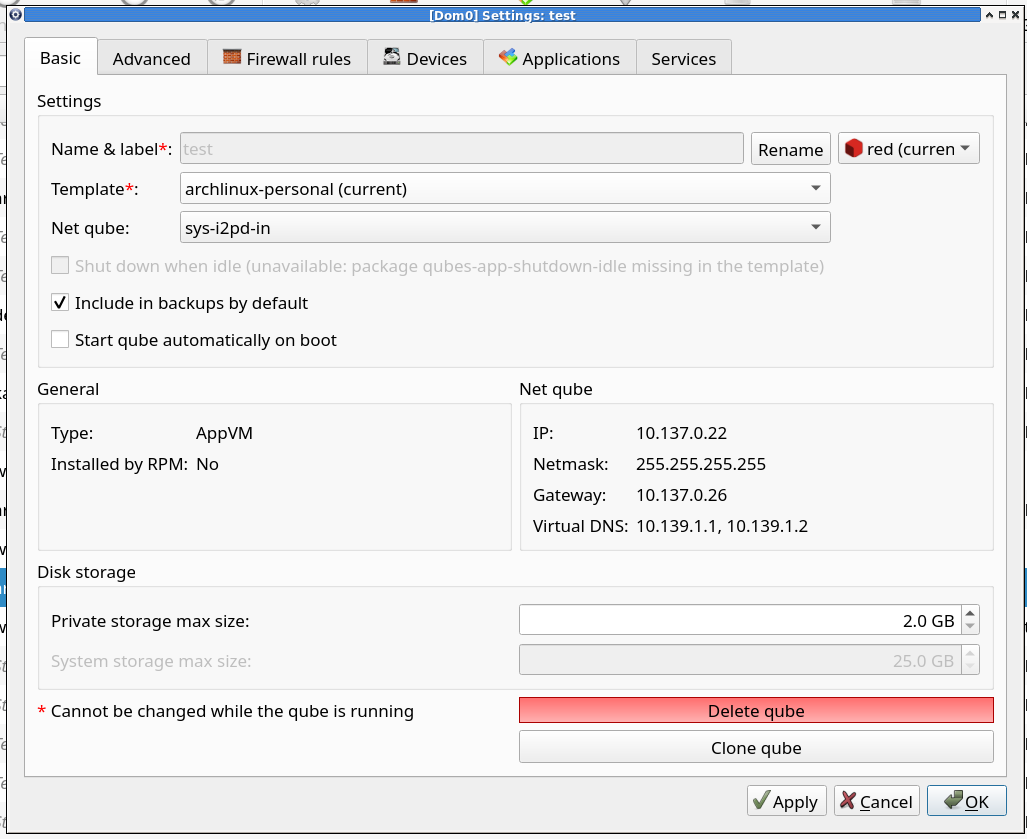
可以创建一个新的测试虚拟机,并选择 sys-i2pd-in 作为网络虚拟机,验证网络是否正常工作,此时你就可以访问 i2p 网络中以 .i2p 结尾的服务或者 clearnet 。
捐赠
我还在考虑
参考内容
- https://repo.i2pd.xyz/.help/readme.html
- i2pd documentation
- Redirecting…
- GitHub - clash-verge-rev/clash-verge-rev: A modern GUI client based on Tauri, designed to run in Windows, macOS and Linux for tailored proxy experience · GitHub
- I2pd netvm guide
qubes os 非官方 中文讨论群组
欢迎你的加入