This guide demonstrates how to set up i2pd as a netvm, allowing you to easily proxy traffic through the i2p network to access the clearnet or i2p services. This significantly enhances security and privacy.
This method is an improved implementation compared to I2pd netvm guide, utilizing debian-12 and avoiding the outdated i2pd-qt and archlinux community template.
Installation
- First, you need a debian-12-xfce template VM.
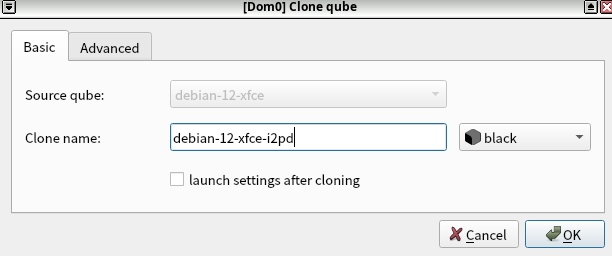
- Clone this template and name it debian-12-xfce-i2pd.
Execute the following commands within the debian-12-xfce-i2pd :
sudo apt install wget
wget -q -O - https://repo.i2pd.xyz/.help/add_repo | sudo bash -s -
sudo apt update
sudo apt install i2pd
This utilizes the i2pd team’s repository, which automatically provides the latest i2pd version.
- Proceed to install clash-verge-rev:
Visit Releases · clash-verge-rev/clash-verge-rev · GitHub to find the appropriate version of clash-verge-rev. This guide uses the latest stable version, v2.0.2. Ensure your debian-12-xfce-i2pd VM has a suitable netvm configured for internet access (you can download the .deb in another VM and transfer it to debian-12-xfce-i2pd).
wget https://github.com/clash-verge-rev/clash-verge-rev/releases/download/v2.0.2/Clash.Verge_2.0.2_amd64.deb
sudo apt install ./Clash.Verge_2.0.2_amd64.deb
shutdown now
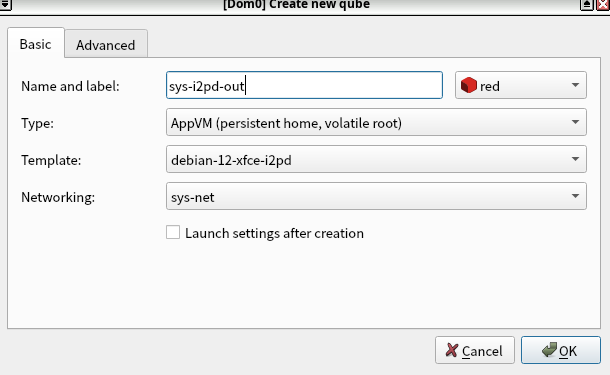
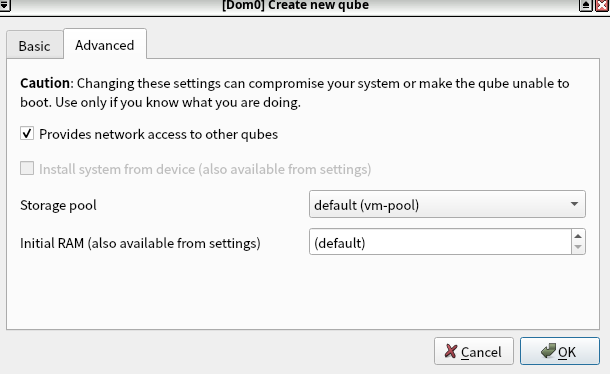
Creating New appvm
Creating sys-i2pd-out

Execute the following commands within sys-i2pd-out:
sudo systemctl enable i2pd.service
sudo nft add rule ip qubes custom-input meta l4proto tcp ct state new,established tcp dport 4500 accept
Wait 10-20 minutes for i2pd to start accepting connections.
In another terminal tab, run the following command for simple monitoring:
watch curl --socks5-hostname 127.0.0.1:4447 acetone.i2p
Proceed to the next step once the above command receives a response.
Modifying Startup Commands
- Paste the following into
/rw/config/rc.local:
#!/bin/bash
sudo nft add rule ip qubes custom-input meta l4proto tcp ct state new,established tcp dport 4500 accept
- Add the following to
/rw/config/qubes-bind-dirs.d/50_user.conf:
binds+=( '/etc/i2pd' )
- Restart the sys-i2pd-out VM.
- Paste the following into
/etc/i2pd/tunnels.conf:
[socks-outproxy-tcp]
type = client
address = 0.0.0.0
port = 4500
keys = transient-outproxy
destination = outproxy.acetone.i2p
destinationport = 1080
inbound.length = 1
outbound.length = 1
inbound.lengthVariance = 1
outbound.lengthVariance = 1

[socks-outproxy-udp]
type = udpclient
address = 127.0.0.1
port = 4500
keys = transient-outproxy
destination = outproxy.acetone.i2p
destinationport = 1080
You can modify some of these parameters if you need to use a different outproxy.
- Add the following to the
[socksproxy]section of/etc/i2pd/i2pd.conf:
outproxy.enabled = true
outproxy = 127.0.0.1
outproxyport = 4500
- Restart the sys-i2pd-out VM.
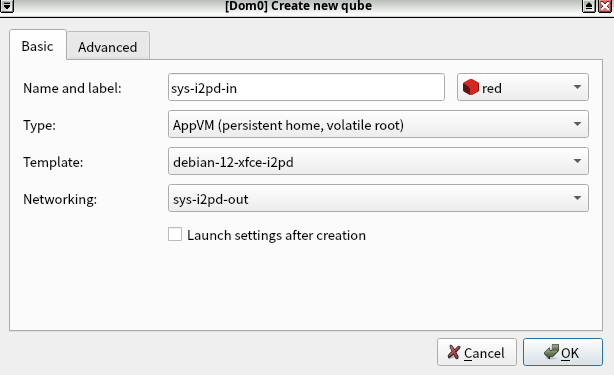
Creating sys-i2pd-in
Open a terminal and type clash-verge to launch the application.


- Create a new profile in the Clash Verge application:
- Click
Profiles > New - Select
Localas the type and save.
- Click
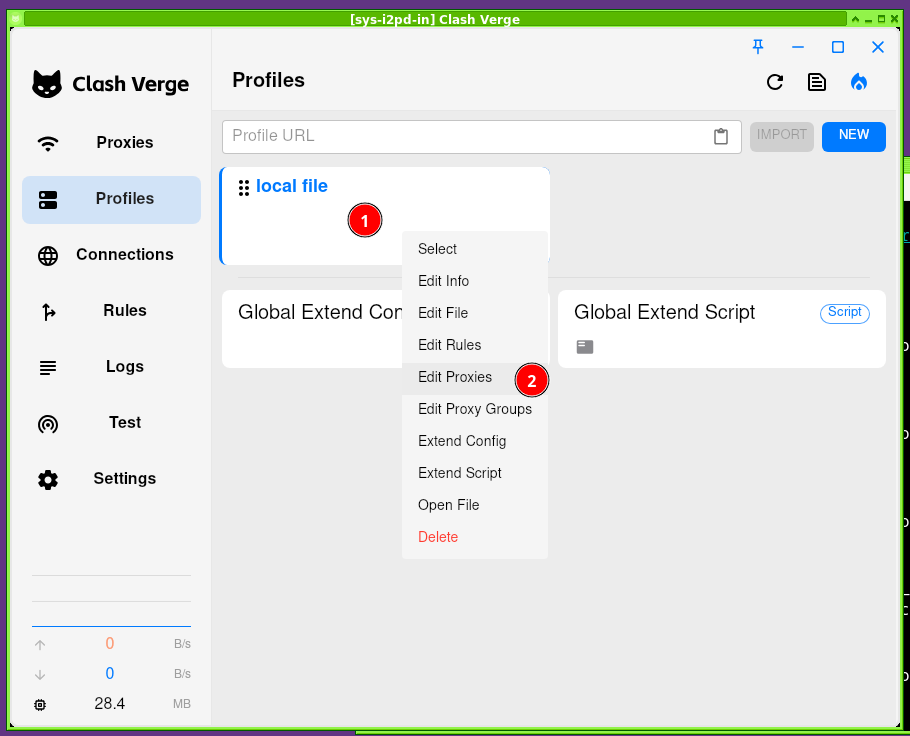
- Edit proxy settings:
- Click
MRB > Edit Proxies.
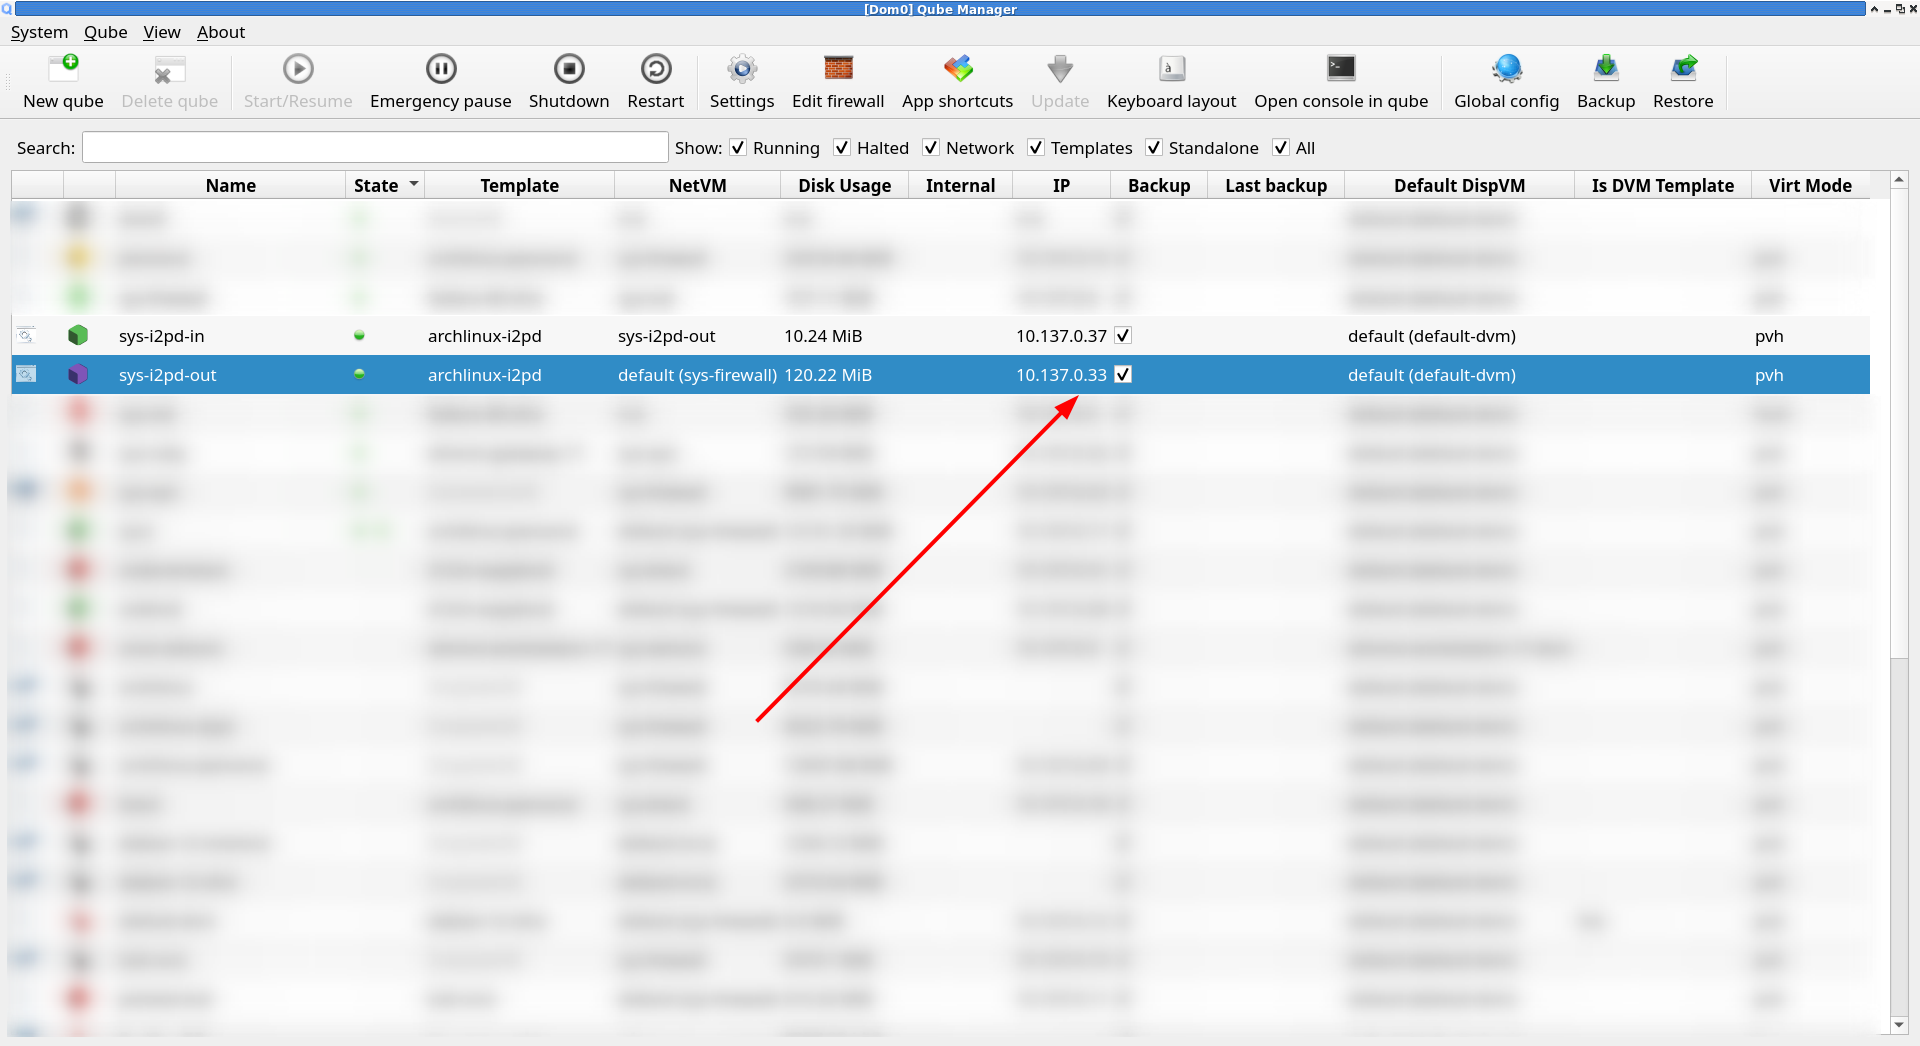
- Check the IP address of sys-i2pd-out in Qube Manager.
- Enter
socks5://<YOUR_IP>:4500and save.
- Click
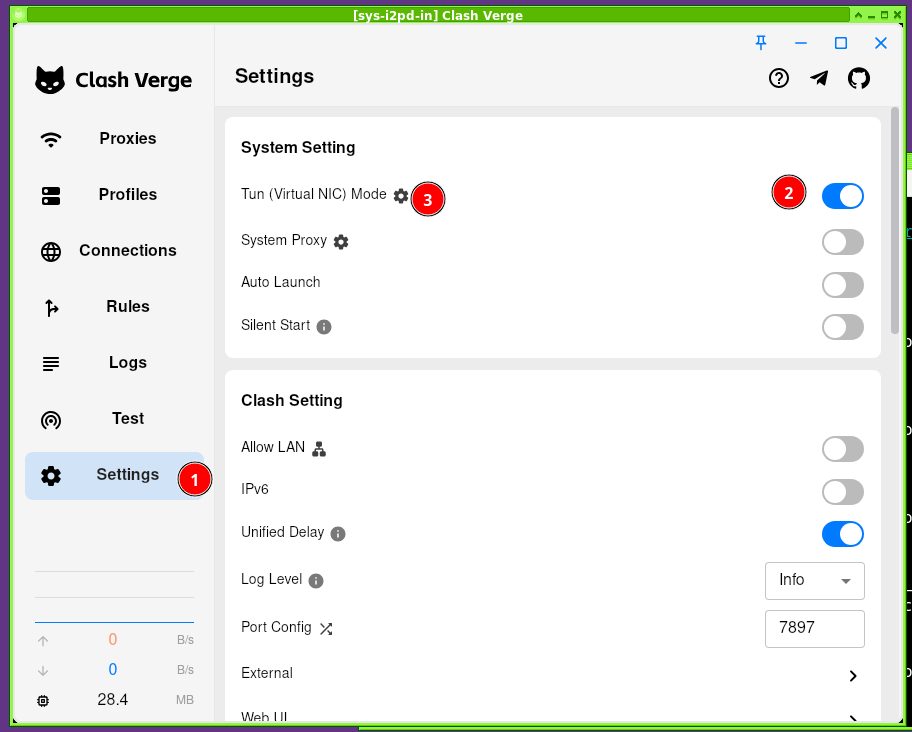
- Enable the proxy in
Proxies > Global.
- Enable autostart in
Setting > System Setting > Auto Launch.


Adding Firewall Rules (Kill Switch)
Execute the following commands in dom0:
qvm-firewall sys-i2pd-in reset
qvm-firewall sys-i2pd-in add accept <sys-i2pd-out-ip-here> dstports=4500 proto=tcp
qvm-firewall sys-i2pd-in del --rule-no 0
Additional Information
Verification
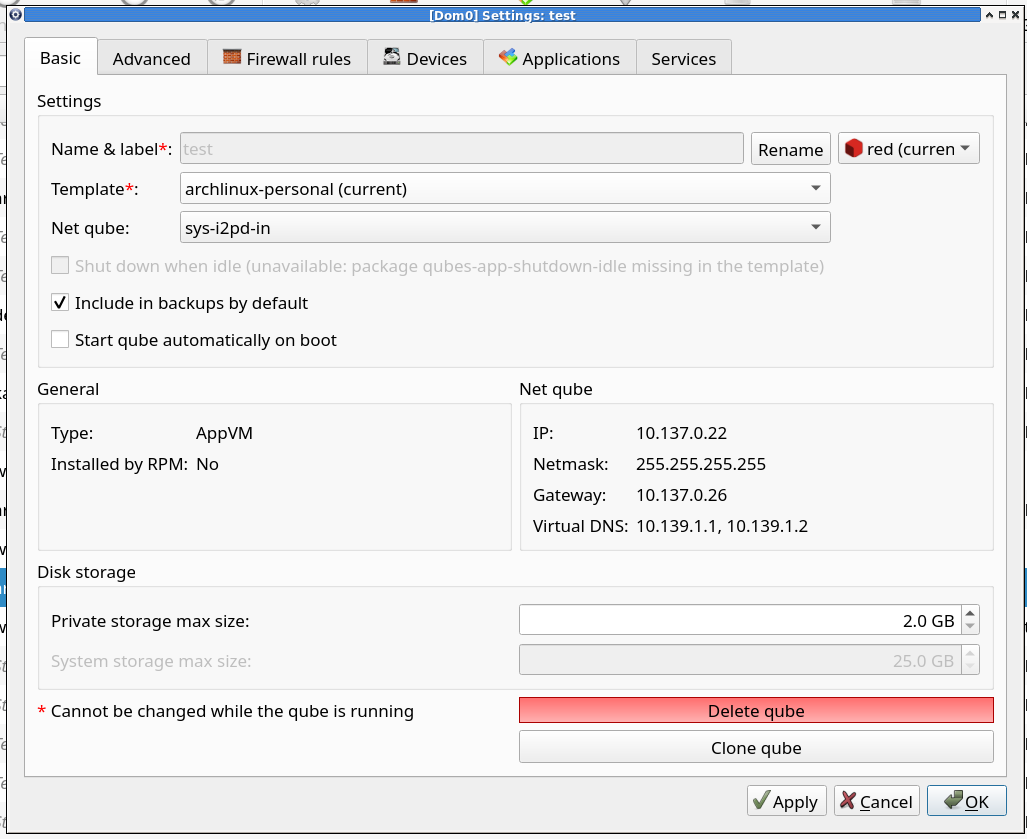
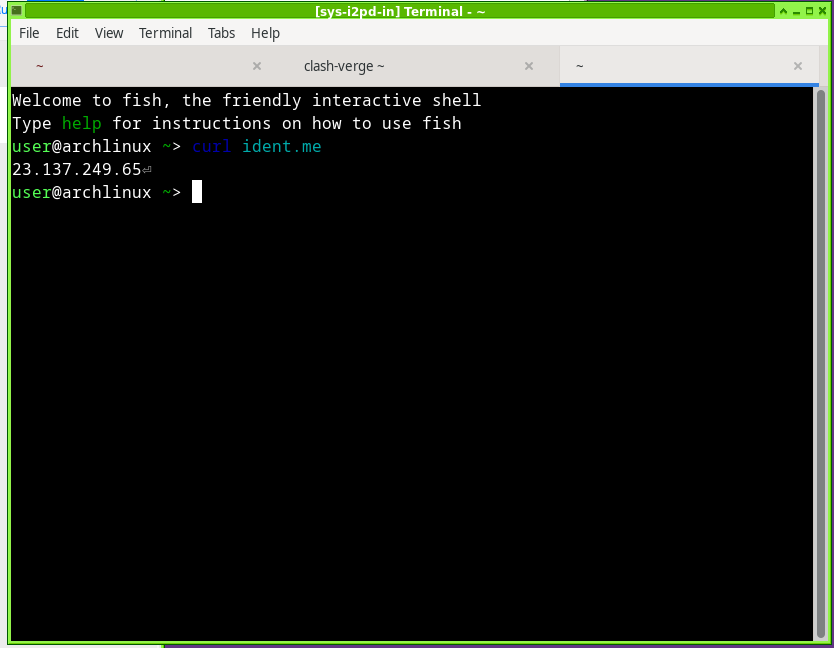
Create a new test VM and select sys-i2pd-in as its netvm to verify network functionality. You should be able to access both .i2p services and the clearnet.
Donation
I’m still considering this.
References
- https://repo.i2pd.xyz/.help/readme.html
- i2pd documentation
- Redirecting…
- GitHub - clash-verge-rev/clash-verge-rev: A modern GUI client based on Tauri, designed to run in Windows, macOS and Linux for tailored proxy experience · GitHub
- I2pd netvm guide
Unofficial Qubes OS Discussion Group
Welcome to join!
https://matrix.to/#/#chat:qubes.live