This guide is made using AI.
The model used was qwen3.5:27B
This guide will go through the steps needed to set up a qube for running GPU accelerated AI inference, and how to integrate AI in multiple AppVMs using a single GPU.
Hide the GPU from dom0
PCI devices cannot be assigned to multiple VMs simultaneously. You will crash the system if you attempt to pass a GPU to any VM while it remains attached to dom0. To prevent this, you must hide the GPU from dom0 before assigning it.
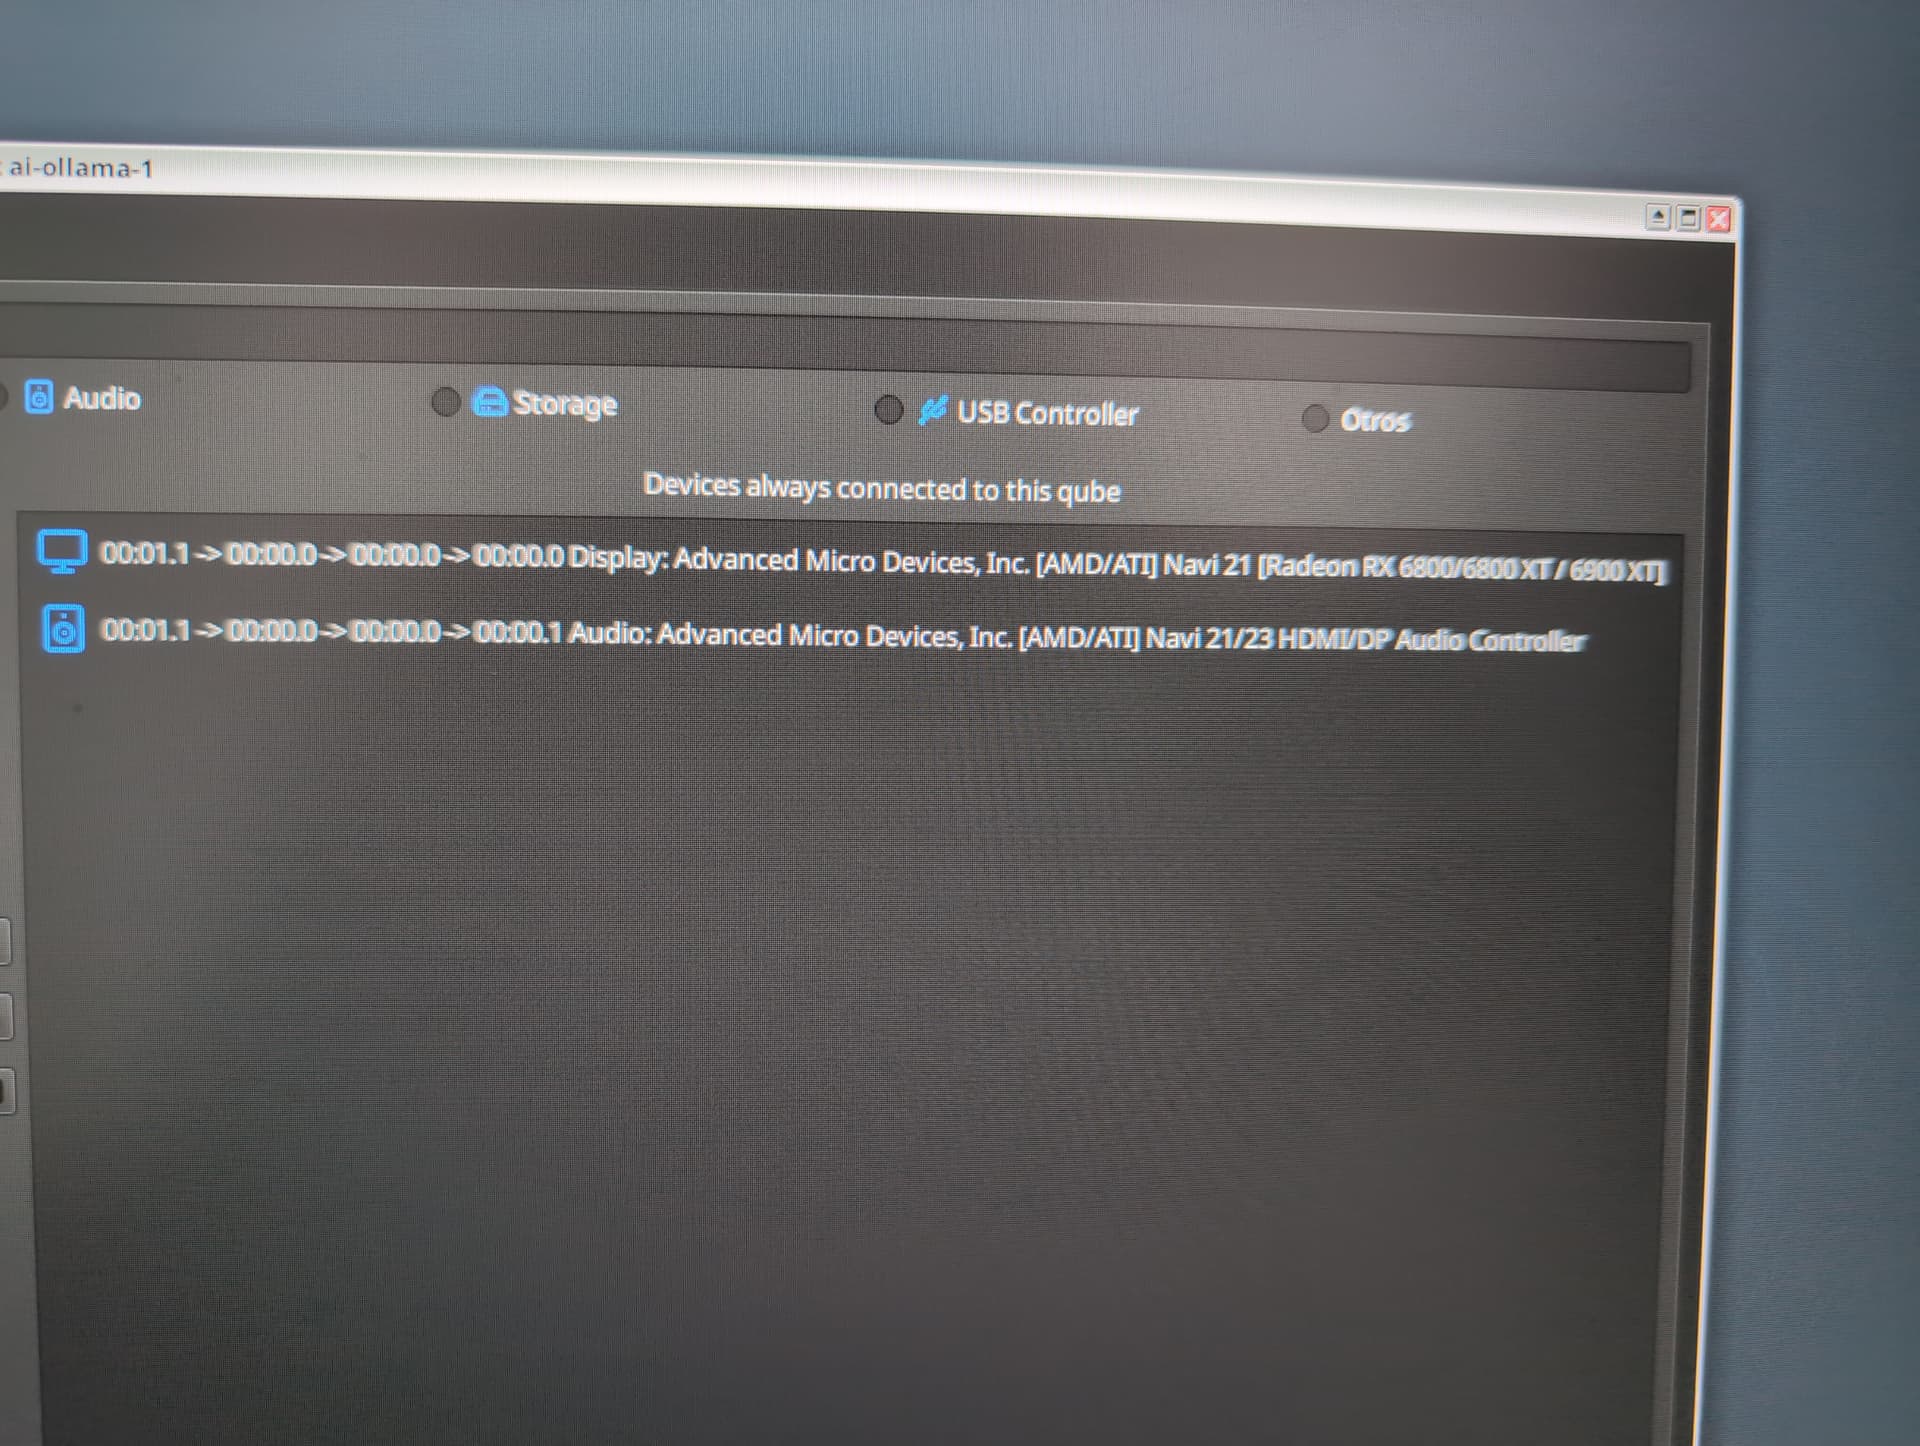
In dom0, use lspci -nn | grep -E ‘VGA|Audio’ to find the ID of the GPU. If an audio device is connected to the same GPU (common with NVIDIA and AMD cards), you must hide both devices.
01:00.0 VGA compatible controller: NVIDIA Corporation AD106 [GeForce RTX 4060 Ti 16GB] (rev a1)
01:00.1 Audio device: NVIDIA Corporation Device 22bd (rev a1)
In Dom0, edit /etc/default/grub and add the IDs to the GRUB_CMDLINE_LINUX variable:
GRUB_CMDLINE_LINUX="$GRUB_CMDLINE_LINUX rd.qubes.hide_pci=01:00.0,01:00.1"
In dom0, rebuild grub.cfg, and reboot the system.
sudo grub2-mkconfig -o /boot/grub/grub.cfg
sudo reboot
After the reboot, use lspci -vvv to verify the driver used by the GPU is pciback, this means the device is hidden.
Kernel driver in use: pciback
Don’t proceed unless the device is hidden, you will crash the system if you attempt to pass the device while it’s attached to dom0.
Create a minimal template
You can skip this step, if you already have a template that can be used to create a standalone HVM.
In dom0, install debian-13-minimal.
qvm-template install debian-13-minimal
In dom0, clone the template.
qvm-clone debian-13-minimal debian-ai-hvm
In dom0, open a terminal with root privileges in the template.
qvm-run --user root debian-ai-hvm xterm
In the template, make the following changes.
# Update and upgrade system packages
apt update && apt upgrade -y

# Install Qubes OS agent packages
apt install qubes-core-agent-passwordless-root \
qubes-core-agent-networking \
qubes-kernel-vm-support

# Install local kernel
apt install grub2 linux-image-amd64 linux-headers-amd64

# Install system utilities
apt install vim curl pciutils

# Configure locales
dpkg-reconfigure locales

#Shutdown the template
reboot
Create an Ollama HVM
The Ollama HVM is the standalone VM running Ollama, and it will be where the GPU is attached. Making this VM standalone makes it easier to install the DKMS device drivers required by the GPU.
In dom0, create the AppVM
qvm-create --standalone --class AppVM --template debian-ai-hvm \
--label green \
--property maxmem=0 \
--property memory=16000 \
--property vcpus=8 \
ai-ollama
Adjust vcpus and memory as needed.
In dom0, open the terminal in the AppVM
qvm-run ai-ollama xterm
In the AppVM, make the following changes, then shut down the VM.
# Configure GRUB to allow the local kernel to boot
sudo grub-install /dev/xvda
sudo update-grub

# Shutdown the AppVM
sudo reboot
In dom0, change the AppVM to HVM with a local kernel.
qvm-prefs --set ai-ollama virt_mode HVM
qvm-prefs --set ai-ollama kernel ""
Resize disk space
You are going to need to resize the storage space for the private volume.
In the qube settings, change the max private storage space to 100 GB, less will do, but keep in mind many models are in the 20 GB range.
You need to increase the timeout value before you start the AppVM, or it’s very likely to crash when you boot it.
In dom0, increase the AppVM qrexec_timeout value
qvm-prefs --set ai-ollama qrexec_timeout 300
Boot the AppVM, expect it to take longer than normal to boot, and verify the disk is increased.
Shut down the AppVM, and restore the original timeout value.
qvm-prefs --set ai-ollama qrexec_timeout 60
Install NVIDIA drivers
You can skip this section if you do not have a NVIDIA GPU.
In dom0, open the terminal in the ollama VM
qvm-run ai-ollama xterm
Use lspci to verify that the GPU has been passed through to the VM.
In the Ollama VM, you may need to enable legacy cryptographic policies to use the NVIDIA drivers. Create the sequoia.config file:
sudo mkdir -p /etc/crypto-policies/back-ends
sudo vim /etc/crypto-policies/back-ends/sequoia.config
Add the following content to sequoia.config
[hash_algorithms]
sha1 = "always"

[asymmetric_algorithms]
rsa1024 = "always"
In the Ollama VM, install the NVIDIA CUDA drivers and shut down the VM
# Download and install the nvidia repository keys
curl -fsSL https://developer.download.nvidia.com/compute/cuda/repos/debian13/x86_64/cuda-keyring_1.1-1_all.deb -o cuda-keyring_1.1-1_all.deb
sudo dpkg -i cuda-keyring_1.1-1_all.deb
sudo apt update

# Install the nvidia drivers
sudo apt install nvidia-kernel-dkms cuda-drivers

# Shutdown
sudo reboot
Start the VM and verify that the GPU is working with nvidia-smi.
Install AMD drivers
You can skip this section if you do not have an AMD GPU.
In dom0, open the terminal in the ollama VM
qvm-run ai-ollama xterm
Use lspci to verify that the GPU has been passed through to the VM.
In the Ollama VM, install the amdgpu-install, amdgpu-dkms, and vulkan packages.
# Download and install the amdgpu-install package
curl -fsSL  https://repo.radeon.com/amdgpu-install/7.2/ubuntu/noble/amdgpu-install_7.2.70200-1_all.deb -o amdgpu-install_7.2.70200-1_all.deb
sudo apt install ./amdgpu-install_7.2.70200-1_all.deb
sudo apt update

# Install amdgpu-dkms
sudo apt install amdgpu-dkms

# Download and install the libdisplay-info1 package from Ubuntu
curl -fsSL http://launchpadlibrarian.net/725825436/libdisplay-info1_0.1.1-2build1_amd64.deb -o libdisplay-info1_0.1.1-2build1_amd64.deb
sudo apt install ./libdisplay-info1_0.1.1-2build1_amd64.deb

# Install amd vulkan driver
sudo amdgpu-install --vulkan=amdvlk,pro

# Shutdown
sudo reboot
Note: The Vulkan driver requires libdisplay-info1, which is not available in the Debian 13 repository. Using the Ubuntu version (linked below) works around this issue:
https://launchpad.net/ubuntu/+source/libdisplay-info/0.1.1-2build1/+build/28132034
Install Ollama
In dom0, open the terminal in the ollama VM
qvm-run ai-ollama xterm
In the Ollama VM, run the ollama install script
curl -fsSL https://ollama.com/install.sh | sh
For AMD users
If you are using an AMD GPU, you must enable Vulkan support. You need to add Environment=“OLLAMA_VULKAN=1” to the systemd service file. Open /etc/systemd/system/ollama.service with a text editor and add this line inside the Service section:
You can verify that Ollama is running by executing the following command
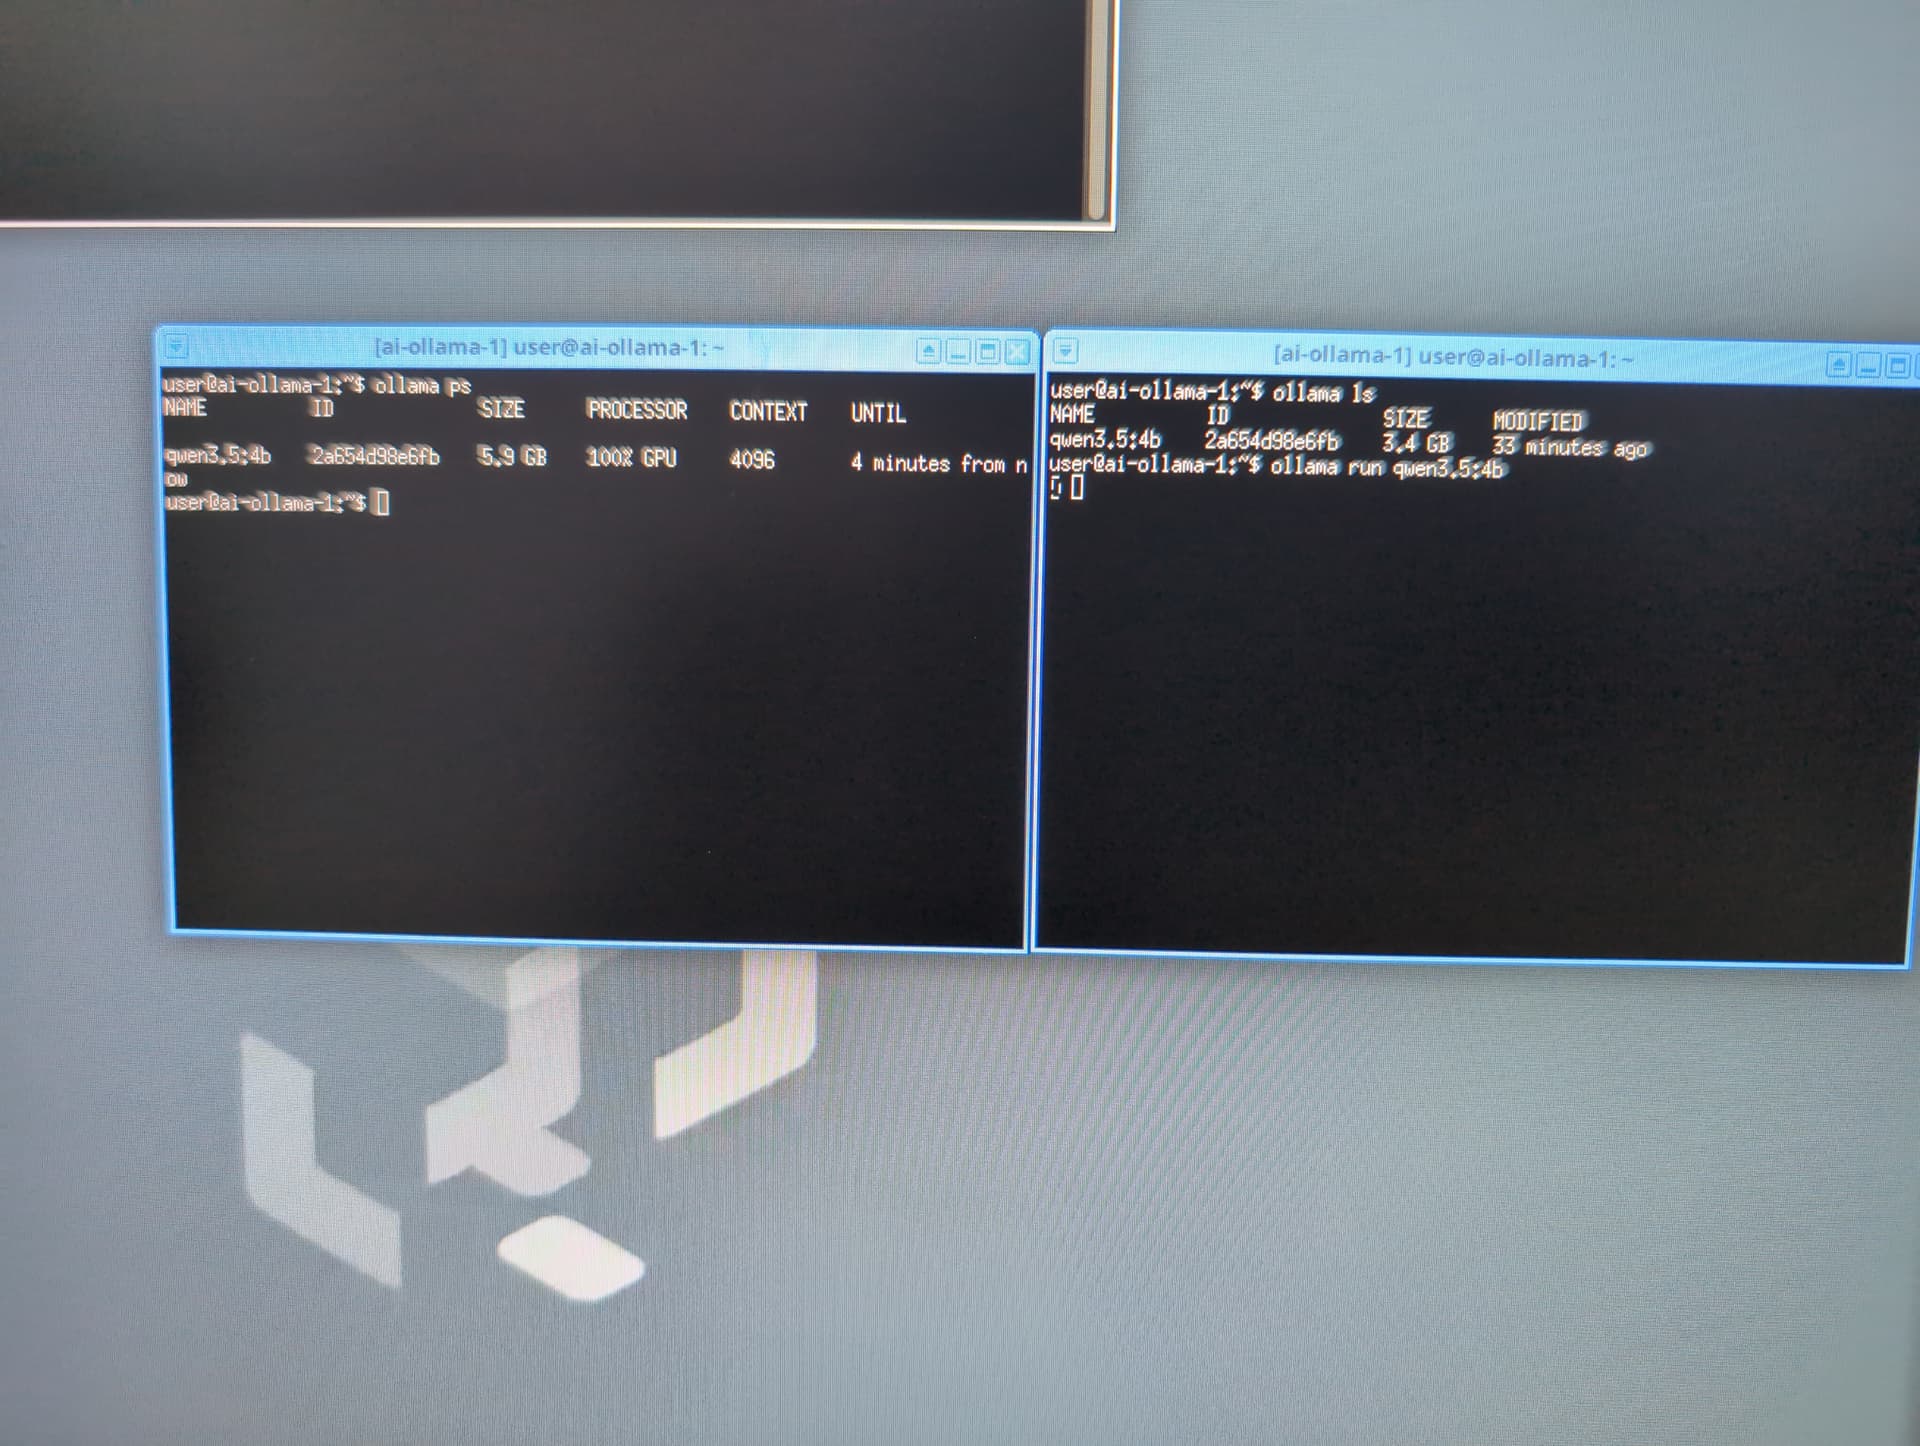
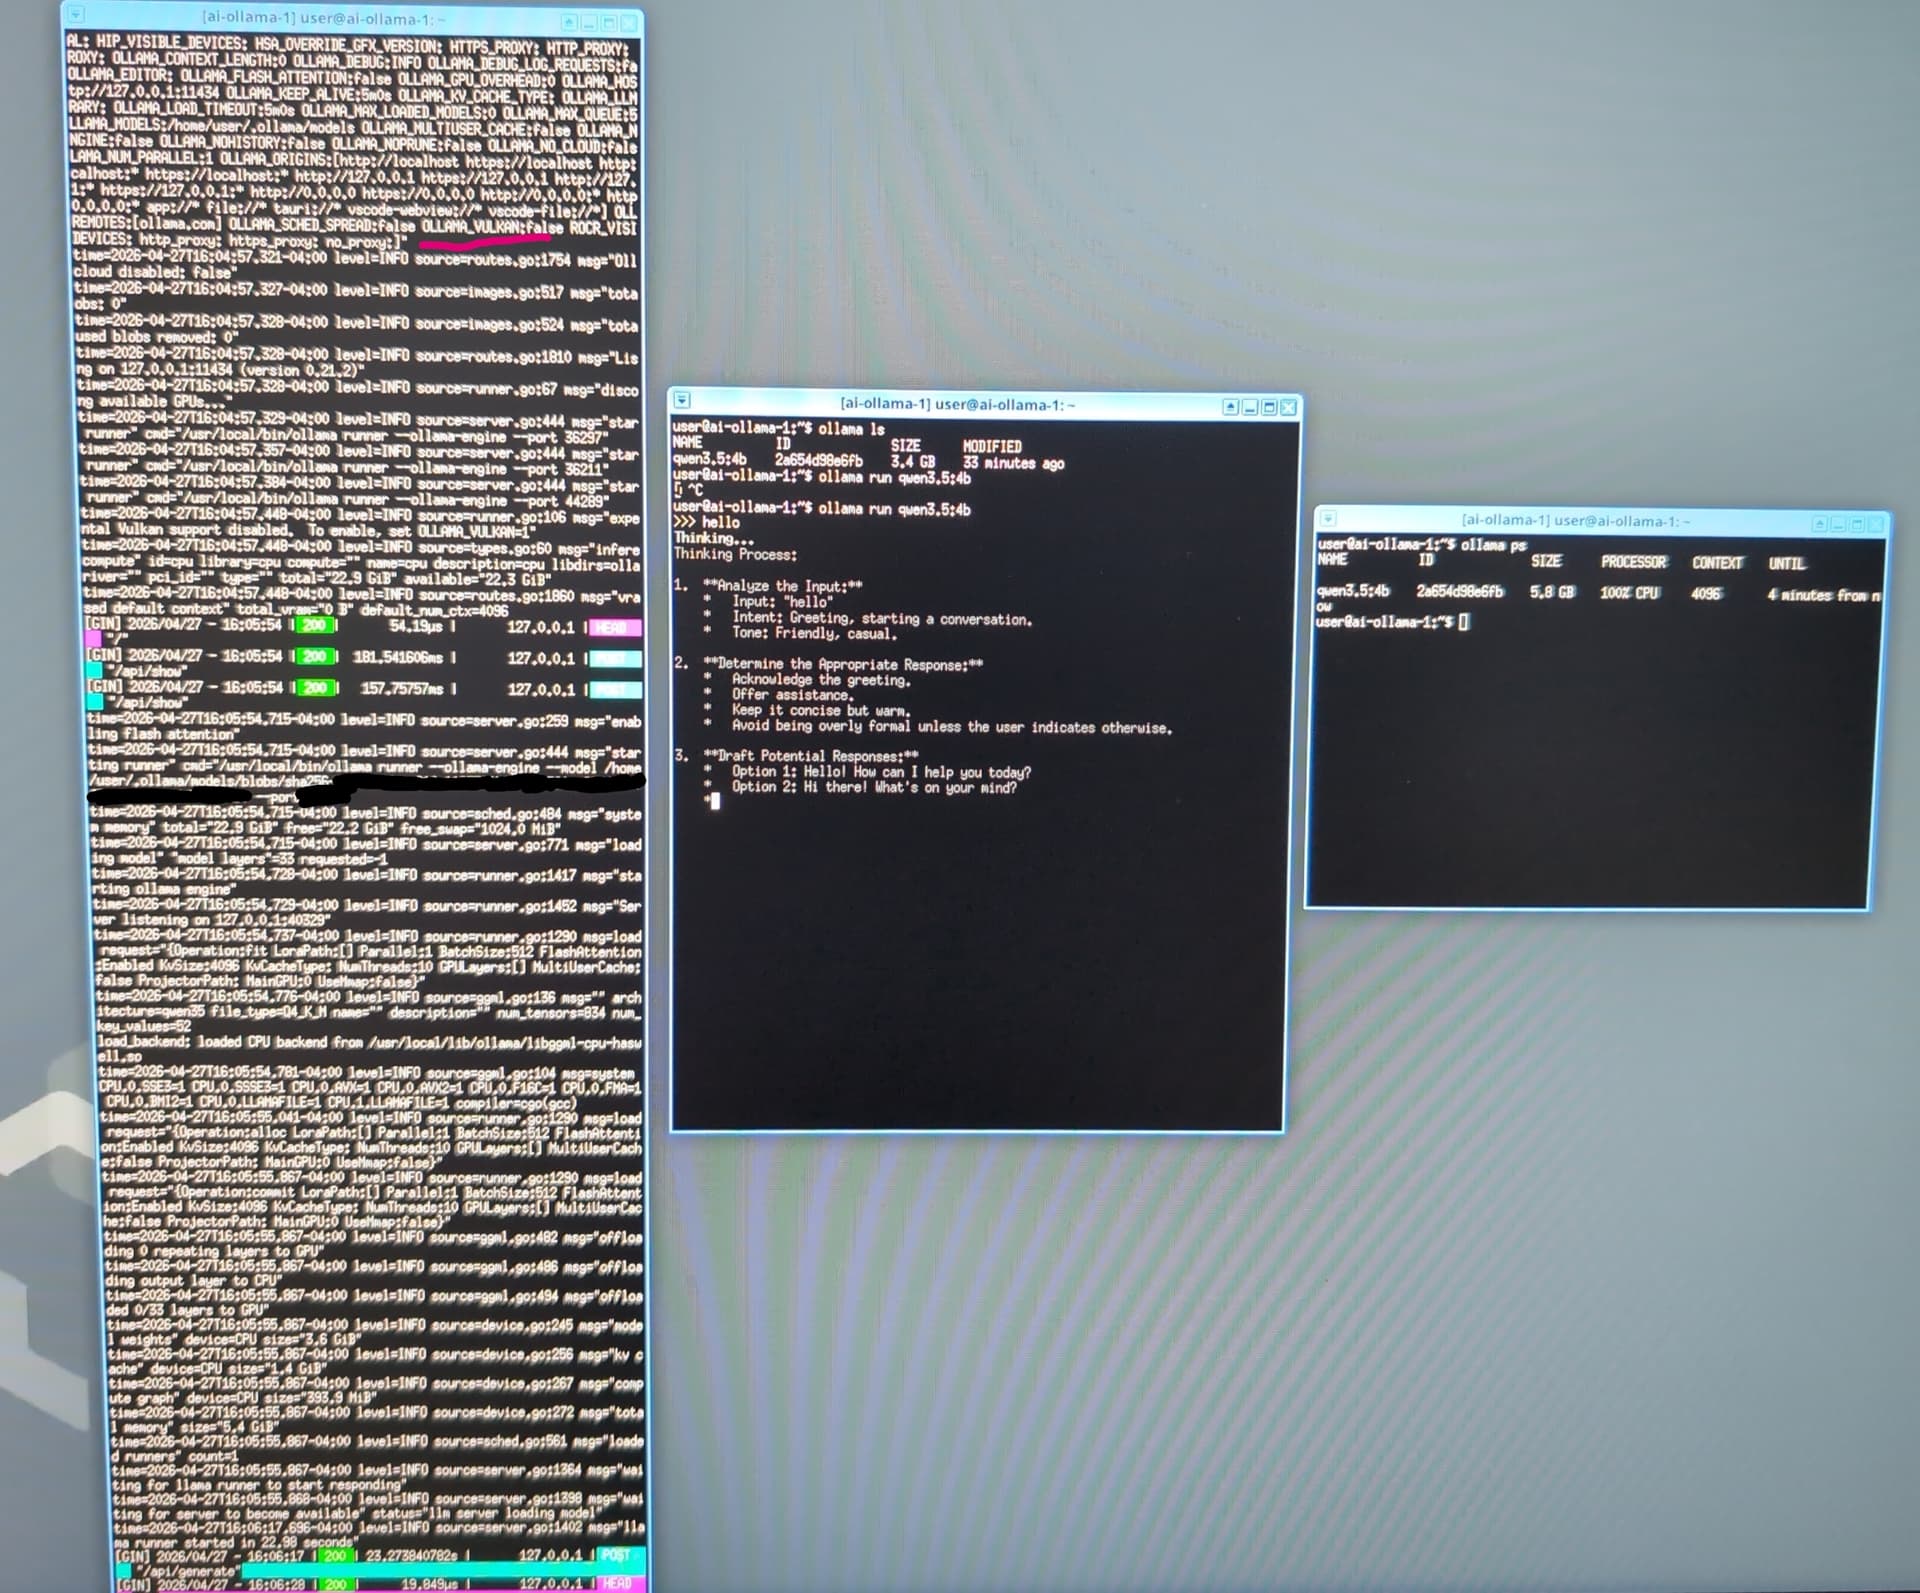
ollama run qwen3.5:4b
You can open a second terminal in the Ollama VM and use the command ollama ps to verify Ollama is using the GPU.
Set up AppVM AI integration
In this example I’ll assume you have a VM called ai-browser with Brave installed, but it could be any VM with an application that can integrate with AI.
In dom0, create the file /etc/qubes/policy.d/30-user-networking.policy
with the following content
qubes.ConnectTCP +11434 ai-browser @default allow target=ai-ollama
This policy allows ai-browser to access ai-ollama, you will need to repeat this step for each new VM you want to allow to use the Ollama API.
In the VM ai-browser, configure qrexec to bind port 11434 from ai-ollama to localhost on ai-browser.
Create the file /rw/config/ollama.socket add the following content:
[Unit]
Description=Ollama socket

[Socket]
ListenStream=127.0.0.1:11434
Accept=true

[Install]
WantedBy=socket.target
Create the file /rw/config/ollama@.service, add the following content:
[Unit]
Description=Ollama service

[Service]
ExecStart=qrexec-client-vm '' qubes.ConnectTCP+11434
StandardInput=socket
StandardOutput=inherit
Restart=always
RestartSec=3
Edit the file /rw/config/rc.local add the following content:
cp -r /rw/config/ollama* /lib/systemd/system/
systemctl daemon-reload
systemctl start ollama.socket
The changes in /rw/config need to be repeated in all VMs that are allowed to access the Ollama API.
Restart the VM ai-browser.
Integrate the Ollama API into Brave Leo to verify everything is working.
In the VM ai-browser, open Brave settings, open the Leo settings, and change the settings to use Ollama
Label: qwen3.5:4b
Model: qwen3.5:4b
endpoint: http://localhost:11434/v1/chat/completions
Default model: qwen3.5:4b
You should now be able to use Leo with the Ollama API as the AI back-end.