This guide combines the best practices from this topic Qubes in tmpfs 🤫.
It offers two live‑mode options in a single convenient menu. The old topic’s founder and one of its main contributors are no longer active on forum. I created this guide so users don’t have to read through the entire topic of almost 100 comments looking for a final solution. I’ve been using this guide for four months.
You will get two ways to launch dom0 in RAM for protection against forensics:
- dom0 in zram0
- dom0 in overlay-tmpfs (Kicksecure/Whonix live mode)
This also works great for experiments in Qubes or for beginners who want to learn without fear of breaking anything - all changes disappear after a reboot. This guide also solves the old problem of porting grub‑live to Qubes.
launching requires a lot of memory: at least 16 GB for zram0 mode and at least 32 GB for overlayfs on tmpfs mode.
Make a backup before you start working!
+ Step 1. Disable Dom0 Swap:
sudo nano /etc/fstab
Using nano, type a # character in front of the line containing “/dev/mapper/qubes_dom0-swap”, to comment it out and disable it, like this:
#/dev/mapper/qubes_dom0-swap ...
Press Ctrl + O to save file.
Press Ctrl + X to exit nano editor.
That will permanently disable your Dom0 Swap after restart, which is likely best for operating Qubes Dom0 in live mode.
If you still want to frequently use Qubes in Persistent mode and have Dom0 Swap enabled, then you can alternatively skip this permanent disable step, and rather temporarily disable Dom0 Swap when you startup Qubes Live by remembering (each and every time) to manually run the following Dom0 command…
sudo swapoff -a
+ Step 2. Edit GRUB to Increase Dom0’s Max RAM:
sudo nano /etc/default/grub
Within the GRUB_CMDLINE_XEN_DEFAULT line, make a partial modification of this line, from dom0_mem=max:4096M to now be dom0_mem=max:10240M → Just change the text “4096M” to “10240M” (without quotes).
Press Ctrl + O to save grub file.
Press Ctrl + X to exit nano editor.
Note: If you have something like 32GB of RAM or greater in your system, and you want to run several fully stateless user qubes within Dom0 RAM space, then you may want to consider increasing this “10240M” Dom0 RAM maximum value, in order to allow for more Dom0 RAM space where you can store more user qubes as fully stateless. For example, with 32GB of system RAM, you may choose to allocate “20480M” (20GB) or even greater if you wish.
!! Important: also change ram-disk size in Step 8 lineecho 10G > /sys/block/zram0/disksize
Regenerate with New GRUB Configuration:
If you are using Qubes 4.2 / 4.3, you should run this single command:
sudo grub2-mkconfig -o /boot/grub2/grub.cfg
+ Step 3. Make New Directorys for Dracut Automation Modules:
sudo mkdir /usr/lib/dracut/modules.d/01ramboot
sudo mkdir /usr/lib/dracut/modules.d/90overlayfs-root
+ Step 4. Make Two Dracut Script Files module-setup.sh:
sudo touch /usr/lib/dracut/modules.d/01ramboot/module-setup.sh
sudo nano /usr/lib/dracut/modules.d/01ramboot/module-setup.sh
add:
#!/usr/bin/bash
check() {
return 0
}
depends() {
return 0
}
install() {
inst_simple "$moddir/tmpfs.sh" "/usr/bin/tmpfs"
inst_hook cleanup 00 "$moddir/pass.sh"
}
Press Ctrl + O to save file.
Press Ctrl + X to exit nano editor.
sudo touch /usr/lib/dracut/modules.d/90overlayfs-root/module-setup.sh
sudo nano /usr/lib/dracut/modules.d/90overlayfs-root/module-setup.sh
add:
#!/bin/bash

check() {
    # do not add modules if the kernel does not have overlayfs support
    [ -d /lib/modules/$kernel/kernel/fs/overlayfs ] || return 1
}

depends() {
    # We do not depend on any modules - just some root
    return 0
}

# called by dracut
installkernel() {
    hostonly='' instmods overlay
}

install() {
    inst_hook pre-pivot 10 "$moddir/overlay-mount.sh"
}
Press Ctrl + O to save file.
Press Ctrl + X to exit nano editor.
+ Step 5. Make New Dracut Script File overlay-mount.sh:
sudo touch /usr/lib/dracut/modules.d/90overlayfs-root/overlay-mount.sh
sudo nano /usr/lib/dracut/modules.d/90overlayfs-root/overlay-mount.sh
add:
#!/bin/sh

# make a read-only nfsroot writeable by using overlayfs
# the nfsroot is already mounted to $NEWROOT

. /lib/dracut-lib.sh

if ! getargbool 0 rootovl ; then
    return
fi

modprobe overlay

# a little bit tuning
mount -o remount,nolock,noatime $NEWROOT

# Move root
mkdir -p /live/image
mount --bind $NEWROOT /live/image
umount $NEWROOT

# Create tmpfs
mkdir /cow
mount -n -t tmpfs -o mode=0755,size=100% tmpfs /cow
mkdir /cow/work /cow/rw

# Merge both to new Filesystem
mount -t overlay -o noatime,lowerdir=/live/image,upperdir=/cow/rw,workdir=/cow/work,default_permissions overlay $NEWROOT

# Let filesystems survive pivot
mkdir -p $NEWROOT/live/cow
mkdir -p $NEWROOT/live/image
mount --bind /cow/rw $NEWROOT/live/cow
umount /cow
mount --bind /live/image $NEWROOT/live/image
umount /live/image
Press Ctrl + O to save file.
Press Ctrl + X to exit nano editor.
+ Step 6. Make New Dracut Script File pass.sh:
sudo touch /usr/lib/dracut/modules.d/01ramboot/pass.sh
sudo chmod 755 /usr/lib/dracut/modules.d/01ramboot/pass.sh
sudo nano /usr/lib/dracut/modules.d/01ramboot/pass.sh
Add:
#!/usr/bin/bash
command -v ask_for_password >/dev/null || . /lib/dracut-crypt-lib.sh
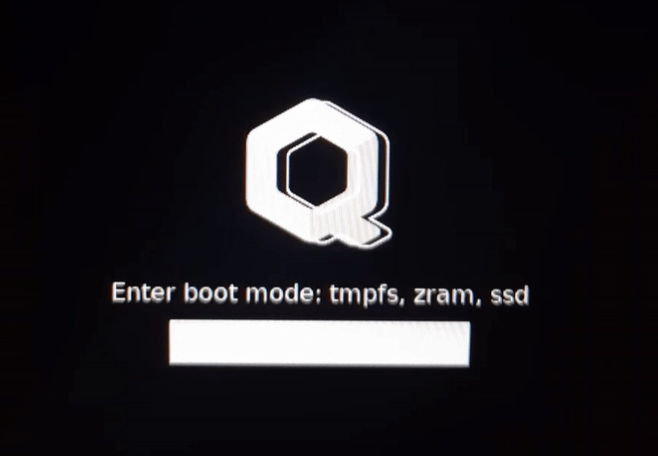
PROMPT="Enter boot mode: t-tmpfs, z-zram0, s-ssd"
CMD="/usr/bin/tmpfs"
TRY="3"
ask_for_password --cmd "$CMD" --prompt "$PROMPT" --tries "$TRY" --ply-cmd "$CMD" --ply-prompt "$PROMPT" --ply-tries "$TRY" --tty-cmd "$CMD" --tty-prompt "$PROMPT" --tty-tries "$TRY" --tty-echo-off
Press Ctrl + O to save file.
Press Ctrl + X to exit nano editor.
You will need to press one of three letters during the Qubes startup. You can edit the line “Enter boot mode: t-tmpfs, z-zram, s-ssd” however you like (but keep in mind that the letter used to launch a mode must not match the first letter of your password! Otherwise, one of the modes will start automatically after you enter the password). If you want to use different letters to launch the modes, then specify those same letters in the next script (Step 8)!
+ Step 7. Make New Dracut Script File tmpfs.sh:
sudo touch /usr/lib/dracut/modules.d/01ramboot/tmpfs.sh
sudo chmod 755 /usr/lib/dracut/modules.d/01ramboot/tmpfs.sh
sudo nano /usr/lib/dracut/modules.d/01ramboot/tmpfs.sh
add:
#!/bin/sh
read line
case "${line:-Nn}" in
[Tt]* )
. /lib/dracut-lib.sh
modprobe overlay
# a little bit tuning
mount -o remount,nolock,noatime $NEWROOT
# Move root
mkdir -p /live/image
mount --bind $NEWROOT /live/image
umount $NEWROOT
# Create tmpfs
mkdir /cow
mount -n -t tmpfs -o mode=0755,size=100% tmpfs /cow
#mount /dev/zram0 /cow
mkdir /cow/work /cow/rw
# Merge both to new Filesystem
mount -t overlay -o noatime,lowerdir=/live/image,upperdir=/cow/rw,workdir=/cow/work,default_permissions overlay $NEWROOT
# Let filesystems survive pivot
mkdir -p $NEWROOT/live/cow
mkdir -p $NEWROOT/live/image
mount --bind /cow/rw $NEWROOT/live/cow
umount /cow
mount --bind /live/image $NEWROOT/live/image
umount /live/image
;;
[Zz]* )
mkdir /mnt
umount /sysroot
mount /dev/mapper/qubes_dom0-root /mnt
modprobe zram
echo 10G > /sys/block/zram0/disksize
/mnt/usr/sbin/mkfs.ext2 /dev/zram0
mount /dev/zram0 /sysroot
cp -a /mnt/* /sysroot
exit 0
;;
[Ss]* )
exit 0
;;
* )
exit 1
;;
esac
Press Ctrl + O to save file.
Press Ctrl + X to exit nano editor.
+ Step 8. Make New Dracut Config File ramboot.conf:
sudo touch /etc/dracut.conf.d/ramboot.conf
sudo nano /etc/dracut.conf.d/ramboot.conf
add:
add_drivers+=" zram "
add_dracutmodules+=" ramboot "
Press Ctrl + O to save file.
Press Ctrl + X to exit nano editor.
+ Step 9. Regenerate with New Dracut Automation Module:
sudo dracut --verbose --force
+ Step 10. Clone dangerous qubes (dvm‑template, appVMs) into a pool in dom0
In the Qube Manager click Clone Qube, then in Advanced select a pool in dom0 (not vm‑pool). If you have a lot of memory, you can run all appVMs (sys, dvm, appVM) in live mode.
Since only dom0 runs in live mode, you have to start the VMs from the pool in dom0. You can use the default pool
varlibqubesor create a new pool.
Then Restart Qubes OS and Test Qubes live modes ![]()
My boot menu version (I just type the first letter of each mode at boot ![]() )
)
zram0 mode saves a lot of memory (you can run roughly twice as many qubes in live mode!), but it takes longer to start (about 30–40 seconds more) and is slightly less secure than overlay-tmpfs.
overlay in tmpfs loads quickly and is maximally secure, but it requires more memory.
Remember that the data will be erased only after a reboot of Qubes OS (like Tails).
You can update templates in live mode, but update dom0 in persistent mode.
If you create a qube in the vm‑pool while in live mode, this qube won’t be saved in the Qube Manager after a reboot.
You can make backups in live mode (I’ve done it many times using a tmpfs setup).
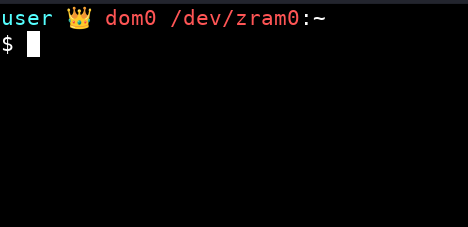
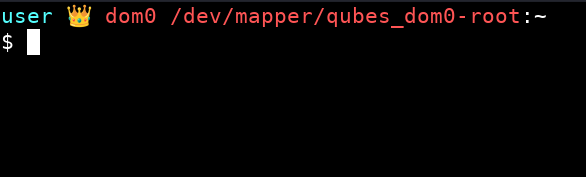
![]() You can use this terminal theme so can see which mode you’re currently in:
You can use this terminal theme so can see which mode you’re currently in:
Click CTRL + H in thunar of dom0 and add this code into .bashrc instead of the default code:
# .bashrc

# Source global definitions
if [ -f /etc/bashrc ]; then
	. /etc/bashrc
fi

# User specific environment
if ! [[ "$PATH" =~ "$HOME/.local/bin:$HOME/bin:" ]]
then
    PATH="$HOME/.local/bin:$HOME/bin:$PATH"
fi
export PATH

###########################


export VIRTUAL_ENV_DISABLE_PROMPT=true


__qubes_update_prompt_data() {
	local RETVAL=$?

	__qubes_venv=''
	[[ -n "$VIRTUAL_ENV" ]] && __qubes_venv=$(basename "$VIRTUAL_ENV")

	__qubes_git=''
	__qubes_git_color=$(tput setaf 10)  # clean
	local git_branch=$(git --no-optional-locks rev-parse --abbrev-ref HEAD 2> /dev/null)
	if [[ -n "$git_branch" ]]; then
		local git_status=$(git --no-optional-locks status --porcelain 2> /dev/null | tail -n 1)
		[[ -n "$git_status" ]] && __qubes_git_color=$(tput setaf 11)  # dirty
		__qubes_git="‹${git_branch}›"
	fi

	__qubes_prompt_symbol_color=$(tput sgr0)
	[[ "$RETVAL" -ne 0 ]] && __qubes_prompt_symbol_color=$(tput setaf 1)


	return $RETVAL  # to preserve retcode
}


if [[ -n "$git_branch" ]]; then
	PROMPT_COMMAND="$PROMPT_COMMAND; __qubes_update_prompt_data"
else
	PROMPT_COMMAND="__qubes_update_prompt_data"
fi


PS1=''
PS1+='\[$(tput setaf 7)\]$(echo -ne $__qubes_venv)\[$(tput sgr0)\]'
PS1+='\[$(tput setaf 14)\]\u'
PS1+='\[$(tput setaf 15)\] 👑 '
PS1+='\[$(tput setaf 9)\]\h'
PS1+=" $(findmnt -n -o SOURCE /)"
PS1+='\[$(tput setaf 15)\]:'
PS1+='\[$(tput setaf 7)\]\w '
PS1+='\[$(echo -ne $__qubes_git_color)\]$(echo -ne $__qubes_git)\[$(tput sgr0)\] '
PS1+='\[$(tput setaf 8)\]\[$([[ -n "$QUBES_THEME_SHOW_TIME" ]] && echo -n "[\t]")\]\[$(tput sgr0)\]'
PS1+='\[$(tput sgr0)\]\n'
PS1+='\[$(echo -ne $__qubes_prompt_symbol_color)\]\$\[$(tput sgr0)\] '
If you have limited memory, use this guide: Really disposable (RAM based) qubes