Sven,
I disagree with your statement.
A statement like “search and find” is unacceptable.
Documentation is for troubleshooting and for experimenting with advanced things.
What angers me most is the fact that the firewall that is supposed to guarantee “reliable” security has failed - and in the RC-3 version.
After all, RC means release candidate.
I can understand the existence of such a bug in an alpha, beta version… But in RC version 3?
What about the zero-trust approach propagated by Joanna?
Since the firewall has been working insecurely since version 4.2, why don’t you make a dual firewall, i.e. a working 4.1 firewall with a 4.2 overlay?
Why are you going to 4.2 with something so heavily untested?
How could I reinstall sys-net and sys-firewall so that they support nftables by default?
It hasn’t failed. You didn’t use it correctly. The problem here is missing documentation. If you want to write that documentation it would greatly help the project. Even just looking up if there is already a task ticket and if not creating one would be helpful.
What I don’t get is your attitude. If you don’t want things to break or be unexpected then don’t play with release candidates.
2 Likes
I think Sven was just trying to be helpful. As I understand his comment, he happened to see your post on his mobile device while he was out and about, and he remembered seeing some info that would be of use to you. He wasn’t in a position to find an exact link himself at that moment (as he usually does when helping others), but he knew you’d find it if you searched, so he suggested doing that. (Sometimes, just knowing that the information is out there can be helpful, since then you know to try different search permutations until you get the expected result.) I don’t think he meant it as a final or permanent ultimate solution for everyone, just a quick hint that might be of some value to you in the moment.
3 Likes
Back to the issue, I am interessed in what has been changed and why this has been changed in 4.2.
Can you please drop the links and explanations on what do I need to do with my VPN firewall settings when 4.2 is officially released?
See the Qubes OS changelog and respective merge request. There’s also an issue open on whether to keep it that way for the final release. Imo it’s reasonable to unify everything to nft as Qubes OS was running nft in the backend on most templates anyway. There was just an iptables compatibility layer in front which made people think that they were using iptables. Probably you can even reinstall it. Imho it leads to the false sense of “I’m seeing the whole picture of my firewall” when in fact you are not. It’s e.g. pretty easy to write nft rules that are invisible to the iptables compatibility layer.
Anyway the screenshots the OP originally posted indicate that s/he didn’t use user-specific scripts, but the firewall GUI. Obviously the GUI should continue to work as expected regardless of the change (that’s one of the reasons why it’s usually better to use the GUI rather than custom scripts). So I’d recommend to create a separate issue at qubes-issues in that case.
Btw DNS and ICMP have always been allowed by the firewall GUI by default, i.e. I wouldn’t be surprised about DNS leaks. Use the qvm-firewall command-line interface to disable DNS.
1 Like
4.2.0 switched from iptables to nft, I don’t think the release notes does at great job at explaining this change, but it does mention it.
I’m not sure if this means you can’t or shouldn’t use iptables in appvms, but iptables doesn’t seem to be included in the debian 12 template.
The main issues I ran into is that you can’t use iptable rules to remove the forwarding rules when settings up a vpn qube, the result being it just uses the default gateway when the VPN is down.
1 Like
Hi all + @Sven
ok - I can write the documentation.
Only first you would have to arrange a meeting for me with the person who implemented the solution.
It has never yet occurred to me to deploy in production something that is not documented in any way.
There is no working firewall in the current “RC” version - even though it worked in r4.1. Such changes should be processed in the “current testing” repository, not in the “stable” repo update server release 4.2-rc3.
In Qubes, things are implemented independently by Qubes developers, so it’s not identical to the implementation in fedora or debian.
In summary, it comes out that Qubes 4.2 has no documentation for the implemented firewall ![]()
Whereas 4.1 has a documented firewall.
Let’s say - how are we supposed to test an RC distribution if we don’t have documentation of the things implemented in it, which are the basis of the distribution?
I don’t know what’s better - throwing out the firewall from qubes 4.2 completely, or having a firewall GUI coming from the 4.1 distribution that is fake, non-functional and unsafe?
I reported the problem here on the forum, and as it turned out later - only a handful of people know about the problem. Is this what testing should be about?
We still didn’t figure why you have this issue though ![]()
In the meantime, I dealt with the problem “around”; I implemented wireguard with kill switch function.
- Create a new qube:*
Click on the Qubes app menu and then Create Qubes VM.
- Name and label: MullvadVPN.
- Type: Qube based on a template (AppVM).
- Template: fedora-38 (or later).
- Networking: default (sys-firewall).
- Advanced: Check (enable) provides network.
- Click on OK.
- (example: in personal qube) Visit www https://mullvad.net/en/account/wireguard-config
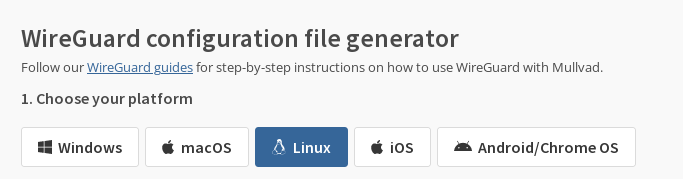
- check the option “Linux”:
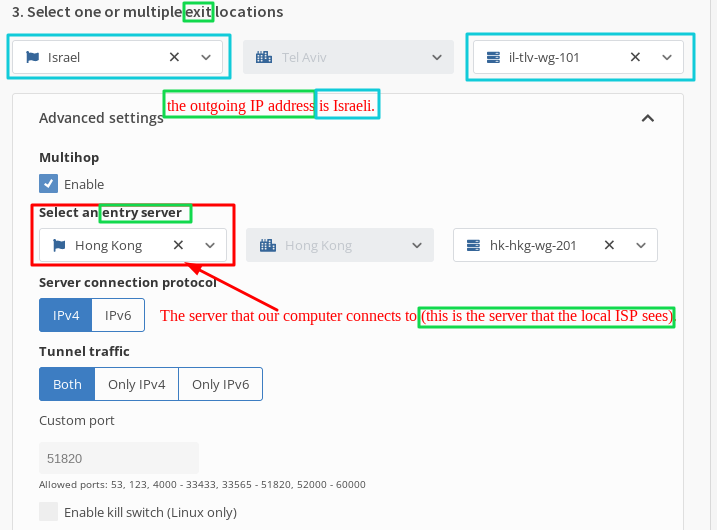
- The server that our computer connects to (this is the server that the local ISP sees). This means that in this example, my computer will only connect to the Honk Kong server, while traffic from the Honk Kong server will be redirected to the Israeli server.
That is, I am connecting to Hong Kong, while the outgoing IP address is Israeli.
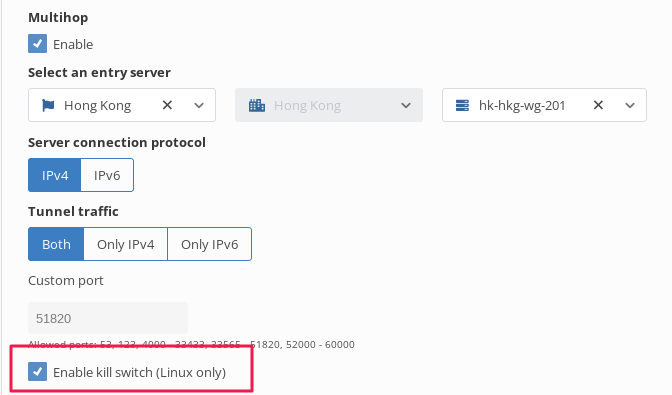
4.Check the “kill switch” option
-
(Optional) select the content to which mullvad should block access:
-
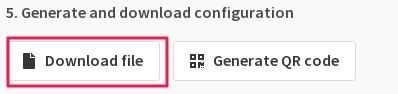
Generate and download configuration.

Note: In the Qubes app menu, the newly created MullvadVPN AppVM qube will show up as “Service: MullvadVPN” and not “Qube: MullvadVPN” due to its “provides network” setting.
- Click on the Qubes app menu and go to your current AppVM and open Files.
- Open the Downloads folder and right click on the downloaded WireGuard file.
- Select Copy To Other AppVM… and then enter MullvadVPN as the Target and click on OK.
- Install WireGuard
We will install WireGuard in the Fedora-38 template so your MullvadVPN ProxyVM can use that.
- Click on the Qubes app menu and go to Template: fedora-38 and open the Terminal.
- In the Terminal run the command
sudo dnf install wireguard-tools -y- Shut down the VM with the command
sudo shutdown -h now- Shutdown and Start the MullvadVPN so that wireguard-tools are added to it.
Configure WireGuard
In the MullvadVPN VM:
- Click on the Qubes app menu and go to MullvadVPN and open the Terminal.
- Now you will copy the WireGuard .conf file that was copied from the other AppVM to the /home/user/ folder so it persist after reboot. First run:
cp /home/user/QubesIncoming/*/se9-wireguard.conf /home/user/- Now you will edit the /rw/config/rc.local file using a text editor. First install nano:
sudo dnf install nano -y- Then run
sudo nano /rw/config/rc.local- Add
wg-quick up /home/user/se9-wireguard.conf
(or the config file you used) on a new line.- Press Ctrl+O (Enter) and then Ctrl+X to save and exit.
Make sure that WireGuard connects:
- Run
sudo wg-quick up /home/user/se9-wireguard.conf- Run
curl https://am.i.mullvad.net/connected- Run
sudo wg
and check for a WireGuard network interface and a peer handshake.
Add DNS hijacking rules
Now we will add firewall rules to redirect DNS requests to 10.64.0.1 (the DNS on the VPN server) for all AppVMs that use the MullvadVPN ProxyVM.
Make sure that you have started an AppVM that has the Networking set to MullvadVPN, otherwise the “vif” IP address will not be visible.
Still in the MullvadVPN Terminal:
- To find out your MullvadVPN_local_IP address, run
ip a | grep eth0 - Edit the firewall user file with nano:
sudo nano /rw/config/qubes-firewall-user-script - Copy and paste the following in the bottom.
Only Replace10.137.0.47
with your own MullvadVPN_local_IP IP address:
**# replace 10.137.0.47 with the IP address of your vif* interface**
virtualif=*10.137.0.47*
vpndns1=10.64.0.1
iptables -F OUTPUT
iptables -I FORWARD -o eth0 -j DROP
iptables -I FORWARD -i eth0 -j DROP
iptables -A FORWARD -p tcp --tcp-flags SYN,RST SYN -j TCPMSS  --clamp-mss-to-pmtu
iptables -F PR-QBS -t nat
iptables -A PR-QBS -t nat -d $virtualif -p udp --dport 53 -j DNAT --to $vpndns1
iptables -A PR-QBS -t nat -d $virtualif -p tcp --dport 53 -j DNAT --to $vpndns1
- Press Ctrl+O (Enter) and then Ctrl+X to save and exit.
Set the Networking
- Click on the Qubes app menu and go to System Tools > Qube Manager.
- Select the AppVM that you want to use with the MullvadVPN ProxyVM and click on the Stop button in the toolbar to shut it down.
- Right click on the same AppVM and then select Qube settings.
- On the Basic tab, click on the Networking drop-down list and select MullvadVPN.
- Click on OK.
- Click on the Start button in the toolbar to start the AppVM again.
Warning
Kill-switch works only when a Wireguard connection is established.
When VM:Mullvad VPN is started before Wifi traffic is established, wireguard will not be automatically set up.
The solution is to create a VPN setup button in the Dom0 panel.
-
Point the mouse cursor at the Dom0 panel, then press the right mouse button and select the option
panel → panel preferences -
in the “Items” tab, press the plus icon, and then press twice on the “launcher” item
-
in the launcher settings, place the pointer in the “Command” field and enter the following command:
qvm-run --pass-io MullvadVPN 'sudo wg-quick up /home/user/config.conf
Remember to replace the name of the “config.conf” file with the name of the wireguard configuration file downloaded from the mullvad website.
Check the option “Run in terminal” and press “save”. From now on, every time you press the icon, it will trigger an attempt to connect to the tunnel.
Preventing leaks in the browser
- Run the firefox browser on the AppVM connected to the MullvadVPN network
- Go to the website Download Extension |Mullvad VPN
- press the “Install” button, and then accept the request to install the browser add-on.
- when you see the mullvad icon on the firefox icon bar, then press on it and select “Connect Proxy” option.
- the Proxy will only work if the Mullvad tunnel is running. When the VPN connection is not established for some reason, the browser will stop allowing traffic to pass through to the Internet (that’s because the proxy is only reachable on the MullvadVPN network by the local mullvad server address)
1 Like
The problem probably stems from the fact that GUI rules are written in Qubes as iptables entries.
Qubes, on the other hand, decided to implement nftables as a firewall and mark iptables as a thing to be abandoned.
That’s how I understood it on github.
Since there is no such information passed through the official route from the developers’ side, it scares me to know what else threatens security, and at the same time the developers know about it :))
@marmarek Do I understand the situation correctly?
the thing is, the firewall tab is working for me on 4.2-RC3 (and on a system that used to be 4.1 and upgraded to 4.2-RC3), so I’m a bit meh at the moment ![]()
Hi,
any news?